Skype, Logic Pro X, and Aggregate Devices …

Scenario:

Studio Host and Skype participant to be recorded inside Logic Pro X on a single machine (single pass) with no additional hardware other than a Mic Input Device.

Objectives:

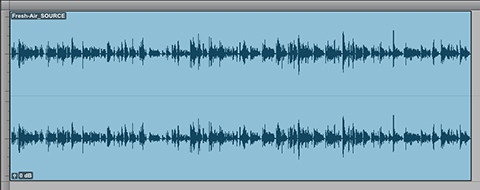
[– Two independent mono Host/Participant stems with no processing.

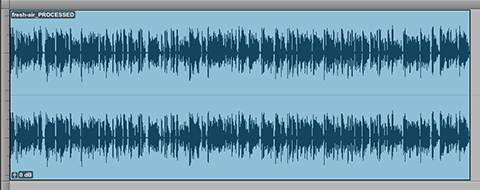
[– One processed split-stereo mixdown of the session with the Host and Guest residing on discrete (L+R) channels.

[– Real time Processing and Recording of all instances.

skype-waves-small

Of course the objectives noted above are easily attainable using two independent machines, with the recording box running Logic Pro X and the Skype machine handling the connection. In this case you would also need to use a mixer to set up a proper mix-minus.

You can also implement similar workflows by using two inexpensive USB audio interfaces connected to a single machine.

Considering the resourcefulness of today’s modern day Macs, I’m confident the following workflow will be successful freeing the user from complexities and added costs.

OSX Aggregate Devices

The foundation of this setup is based on a user created Aggregate Audio Device. Aggregate devices appear in the OSX System Preferences/Sound I/O options for system wide use. By wrapping supported “Subdevices” into a single Aggregate, you effectivly create a sort of cumulative Input Device that can be designated in Logic as the default. We also need a software utility that supports routing of the Skype Output to an Input in Logic.

I originally created this workflow using SoundFlower that was installed on my secondary iMac and carried over form previous versions of OSX. SoundFlower, along with the iMac’s Line Input were wrapped into a single Aggregate Device, and then designated in Logic as the default Input.

This worked well. However, I had no plans to install the now unsupported SoundFlower on my production MacPro for further testing. And so I looked around for a suitable up to date (and actively developed) replacement for SoundFlower.

Sound Siphon

Sound Siphon by Static Z Software “… makes your Mac’s Audio Output available as an Audio Input Device. It enables you to send audio from one application to another where it can be processed, streamed, or recorded.

Exactly what I needed.

Note that Sound Siphon is very diverse in terms of features. And the developer states that many useful enhancements are in the works. You can download a restricted demo. My hope is that you consider purchasing a $29.99 license. This will ensure the longevity of the application and continued development. Note that I have no affilation and I gladly purchased a license.

This is a snapshot of Sound Siphon:

ss-small

In the example above I display a user defined Device (“Capture Safari”) that is essentially a Custom Audio Input. I then associated the Safari Application with this device. This becomes a system wide option to capture Safari audio. For example QuickTime X will now display “Capture Safari” as an Input option for audio recording.

It’s important to note that this particular Sound Siphon feature is supplemental to the Skype recording implementation. In other words – it’s an entrley different use case scenario. My goal here is to disclose the flexibility of the application.

Creating the Aggregate Device

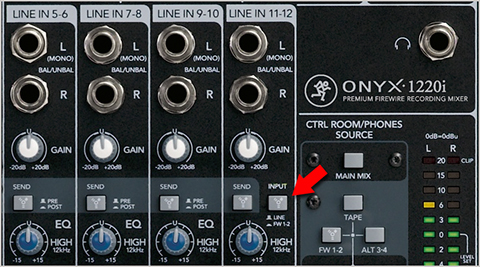
Input 1 on my Mackie Onyx 1220i Mixer receives the output from a dbx 286A Voice Processor. The studio Mic is connected to the processor for proper gain staging. I needed to wrap the Mic signal along with the Skype audio into a single Input Device and designate it in Logic’s Preferences for proper routing.

To create an Aggregate Device, open Audio MIDI Setup, located in ~/Applications/Utilities. When creating a new Aggregate, supported Subdevices appear in the right side setup table.

midi-small-44

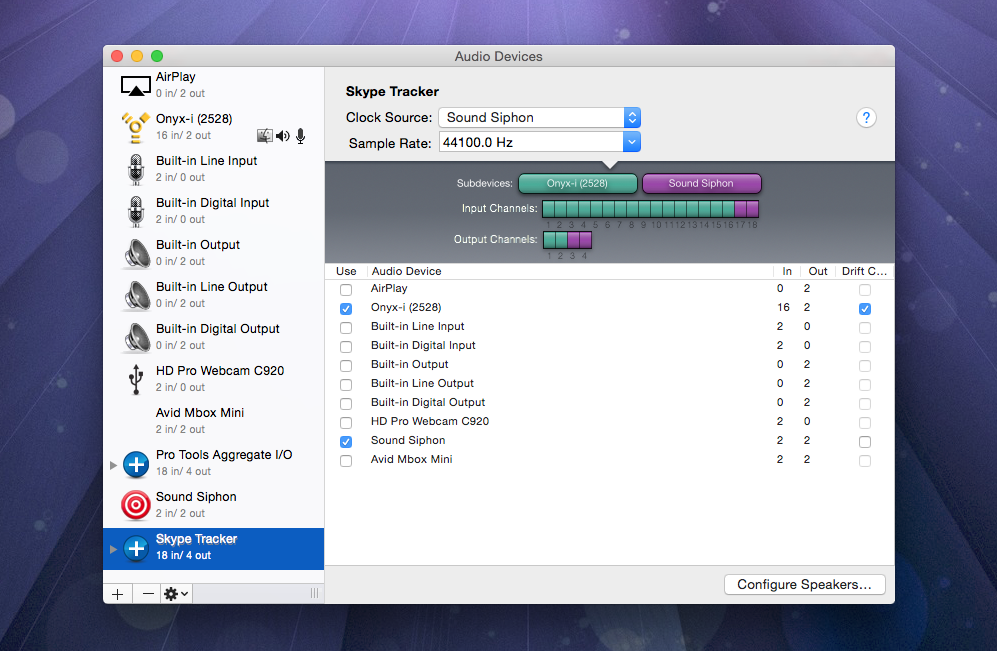
Notice that Sound Siphon is listed as a 2 in/2 out device in the left source view. This is created when you install the application. Once installed, it will be available to be wrapped into an Aggregate Device along with pre-existing devices.

For my implementation I created “Skype Tracker” as a new Aggregate and selected my mixer (Onyx-(2528)) and Sound Siphon as Subdevices. Up top you set your Sample Rate and the Clock Source. My system seems to perform better with Sound Siphon set as the Clock Source.

It’s important to review the Input Channel matrix of the new Aggregate Device. Notice that Sound Siphon will only support Input channels (17+18). When routing Inputs in Logic, I will use Input 1 for the studio Mic and Input 17 for Skype.

Skype

Here are the Skype settings that I am using:

skype-44

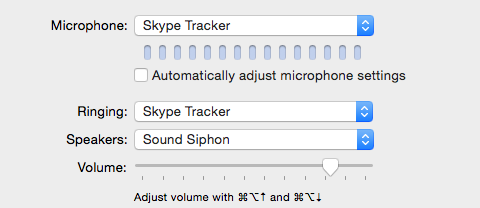
The Microphone is set to the Aggregate Device. The Speakers option is set to Sound Siphon. This setting is imperative and from what I can tell non-flexiable.

Logic Pro X

The first thing we need to do is define the Input Device in Global Preferences/Audio/Devices. I set mine to the Aggregate Device:

prefs-sm-44

Next we will address setup and routing. What’s important here is that I use an Object in Logic that may not be immediately obvious in your particular installation.

Specifically, I often use Input Channel Strip Objects in my projects. They are implemented in the Environemnt (aka “MIDI Environment”). It is accessible form the Logic Window Menu.

From the Logic Docs regarding Input Channel Strips:

“The Input Channel Strip allows you to directly route and control signals from your audio hardware’s Inputs. Once an Input Channel Strip is assigned to an Audio Channel Strip, it can be monitored and recorded directly into Logic Pro, along with its effect plug-ins.

The signal is processed, inclusive of plug-ins even while Logic Pro is not playing. In other words, Input Channel Strips can behave just like external hardware processors. Aux sends can be used pre- or post-fader.

Input Channel Strips can be used as live Inputs that can stream audio signals from external sources (such as MIDI synthesizers and sound modules) into a stereo mix (by bouncing an Output Channel Strip).”

You can also create Bus Channel Strip Objects in the Environment. They are not the same as Auxiliary Channel Strips and can be quite useful in certain instances. For more information about Bus Channel Strips please refer to this article.

The Environment

To expose the accessibility of the Logic Environment, open global Preferences and access the Advanced options. The MIDI option needs to be selected as part of the Advanced Tools:

prefs-small

Once that setting is ticked, “Open Midi Environment” will appear as an option in the Logic Window Menu.

Channel Strip Objects are added to the Environment from the New Menu/Channel Strip. Notice how the Environment emulates the Project Mixer:

add-env-sm-55

Note that when adding Input Channel Strips in the Environment, you must define the corresponding (Aggregate) Device Inputs using the Channel Strip editor:

env-sm-77

For this particular project I created two Input Channel Strips in the Environment using Inputs 1 and 17 respectively, based on Aggregate Subdevice availability (Input 1 = Mic, Input 17 = Skype).

You will also need 4 Audio Tracks (2 Mono, 1 Stereo, 1 PreListen), and 2 (Mono) Auxiliary Channel Strips. Create Audio Tracks using the Track/New Tracks option – located in the Logic Application Menu. Add Auxiliary Channel Strips using the Mixer’s Options Menu/Create New … || Note that the Input Channel Strips created in the Environment should be designated Mono.

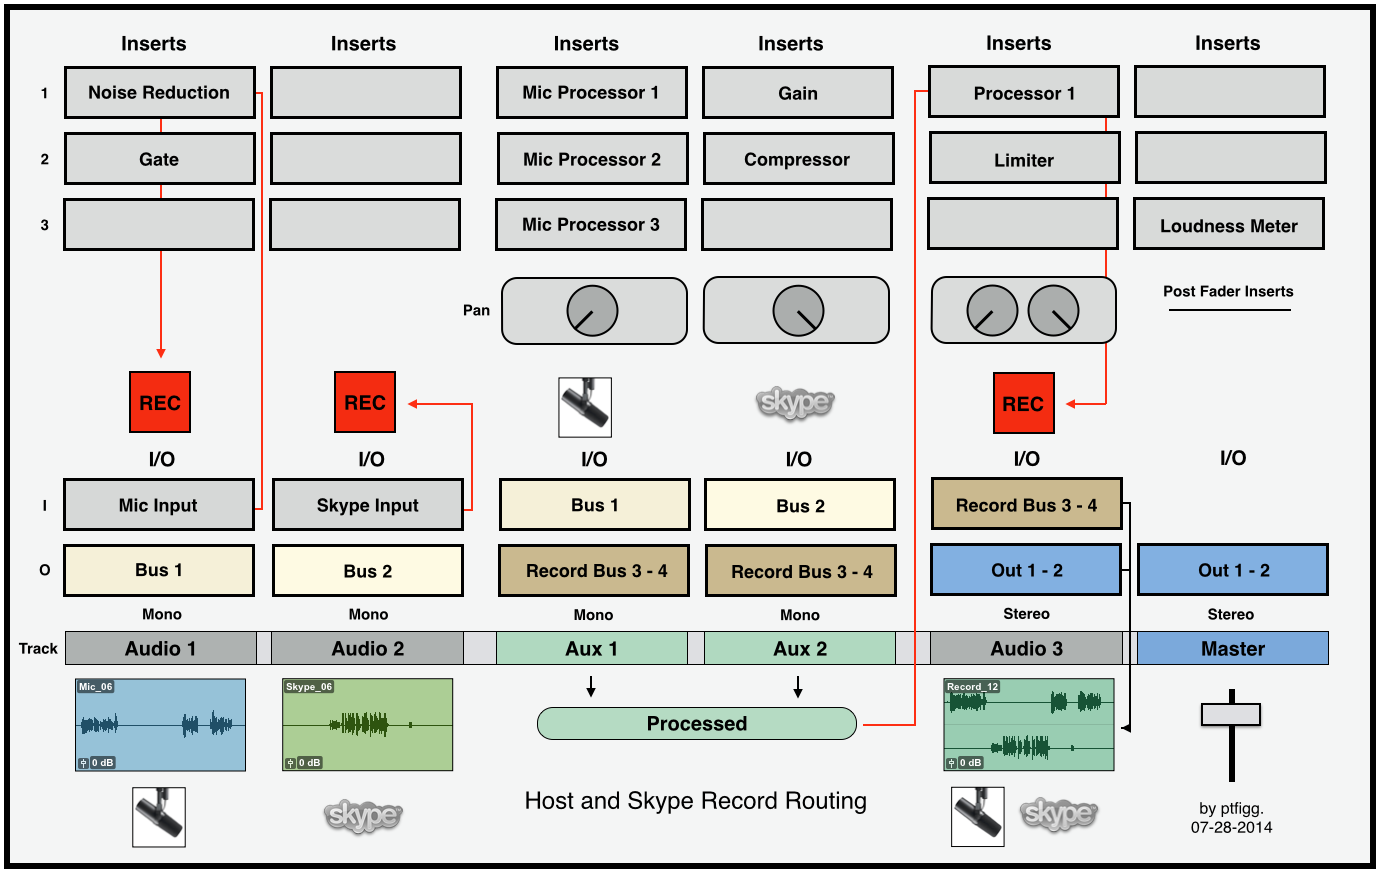
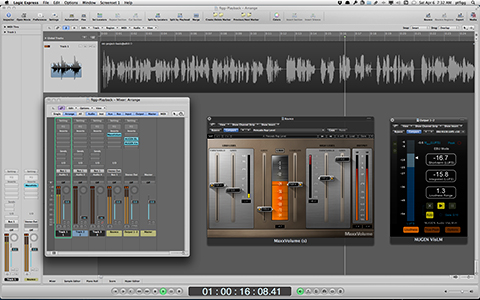
Here is my Project Mixer with all necessary Objects and Routing:

mixer-new-sm-44

Routing

The reddish labeled channels are the two Input Channel Strips that I created in the Environment. If you look at the text at the very top of these Channel Strips, you will see their Input designations.

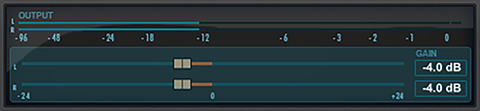
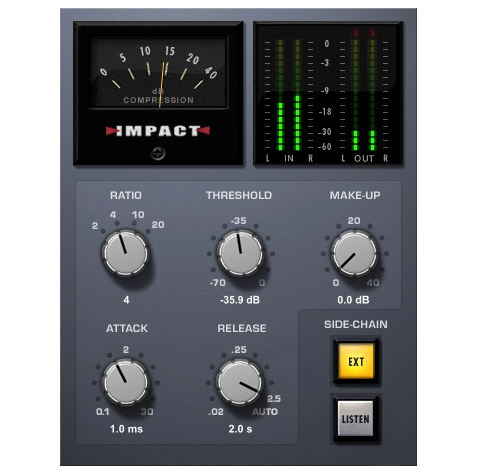
The signals coming in through the Inputs are routed to their own independent Aux Channels for processing. Notice I inserted a Gain Trim on the Mic Input Channel. All processing options are of course subjective. One example would be to insert two instances of a Compressor on each Aux Channel. You would set these up to apply real time, non-aggresive dynamic range compression as you record.

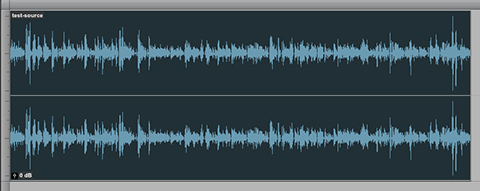
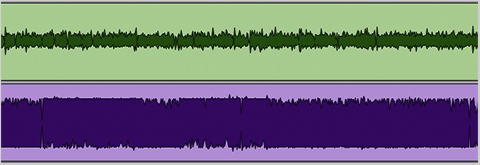
Moving forward – notice the Aux Channels are Mono and hard panned L+R respectivly. This will maintain channel separation when recording the split-stereo version of the session. In this example each Aux Channel Output is routed to Audio Channel 3 (“Split Record”). This Stereo Audio Track is panned center. When armed it will record the Aux Channel Outputs to a split-stereo file.

Also study how I set up the remaining Audio Tracks – Audio Track 1 (“Rec. Mic”) and Audio Track 2 (“Rec. Skype”). Their Inputs are set to Bus 1 and 2 respectively, allowing these tracks to receive the unprocessed Outputs (“dry” audio) from the Input Channel Strips.

Keep in mind that if Effects are inserted on the Input Channel Strips, the audio routed to Audio Tracks 1+2 will be processed. In most cases I would not insert any Effects on the Input Channel Strips other than Gain. My intension here is to record dry stems.

I Grouped various aspects of these two channels, mainly Volume, Mute, Solo, and Record. This will link the faders and make it easy to control audibility of the mono stems cumulatively.

Wrap Up

That’s basicilly it. You can record/monitor all tracks in real time. And when you are done, there is no need to bounce, although you still can. You simply “Export” or “Export Region” as an individual file(s).

waves-22-small

Notes

You may have noticed the Outputs for the Auxiliary Channel Strips (1+2) and the Input for Audio Track 3 (“Split Record”) is Bus 3. This is in fact a virtual (permanent) Bus used to route the processed audio to Track 3 for recording.

When you select a permanent virtual Bus in Logic for routing, an Auxiliary Channel Strip is auto-created and will appear in the Mixer. For this particular workflow – we use two Auxiliary Channel Strips, one for Mic processing and a second for Skype processing.

Throughout this entire workflow no changes were made to my default OSX Audio I/O Settings located in System Preferences/Sound.

As I always say – Audio Tracking and Post are highly subjective arts. In fact many Logic “experts” have never heard of or utilized the options in the Environment. And your processing options are also subjective. My hope is this documentation will at the very least introduce you the creation and usage of Aggregate Devices.

If by chance you develop a successful alternative solution, all well and good. In my tests I’ve found the documented implementation to work quite well.

Let me know if you have any questions.

I’d like to thank my friend Victor Cajiao for his help while testing this workflow.

-paul.

Asymmetric Waveforms: Should You Be Concerned?

In order to understand the attributes of asymmetric waveforms, it’s important to clarify the differences between DC Offset and Asymmetry …

Waveform Basics

A waveform consists of both a Positive and Negative side, separated by a center (X) axis or “Baseline.” This Baseline represents Zero (∞) amplitude as displayed on the (Y) axis. The center portion of the waveform that is anchored to the Baseline may be referred to as the mean amplitude.

wf-480

DC Offset

DC Offset occurs when the mean amplitude of a waveform is off the center axis due to differing amounts of the signal shifting to the positive or negative side of the waveform.

One common cause of this shift is when faulty electronics insert a DC current into the signal. This abnormality can be corrected in most file based editing applications and DAW’s. Left uncorrected, audio with DC Offset will exhibit compromised dynamic range and a loss of headroom.

Notice the displacement of the mean amplitude:

dc-offset-ex-480-png

The same clip after applying DC Offset correction. Also, notice the preexisting placement of (+/-) energy:

dc-offset-removed-480

Asymmetry

Unlike waveforms that indicate DC Offset, Asymmetric waveform’s mean amplitude will reside on the center axis. However the representations of positive and negative amplitude (energy) will be disproportionate. This can inhibit the amount of gain that can be safely applied to the audio.

In fact, the elevated side of a waveform will tap the target ceiling before it’s counterpart resulting in possible distortion and the loss of headroom.

High-pass filters, and aggressive low-end processing are common causes of asymmetric waveforms. Adding gain to asymmetric waveforms will further intensify the disproportionate placement of energy.

In this example I applied a high-pass filter resulting in asymmetry:

asymm-matural-480

Broadcast Chains

Broadcast engineers closely monitor positive to negative energy distribution as their audio passes through various stages of processing and transmission. Proper symmetry aides in the ability to process a signal more effectively downstream. In essence uniform gain improves clarity and maximizes loudness.

Podcasts

In spoken word – symmetry allows the voice to ride higher in the mix with a lower risk of distortion. Since many Podcast Producers will be adding gain to their mastered audio when loudness normalizing to targets, the benefits of symmetric waveforms are obvious.

If an audio clip’s waveform(s) are asymmetric and the audio exhibits audible distortion and/or a loss of headroom, a Phase Rotator can be used to reestablish proper symmetry.

Below is a segment lifted from a distributed Podcast (full zoom out). Notice the lack of symmetry, with the positive side of the waveform limited much more aggressively than the negative:

podcast-asymm-480

The same clip after Phase Rotation:

asymm-podcas-fixed-480

(I processed the clip above using the Adaptive Phase Rotation option located in iZotope’s RX 4 Advanced Channel Ops module.)

In Conclusion

Please note that asymmetric waveforms are not necessarily bad. In fact the human voice (most notably male) is often asymmetric by nature. If your audio is well recorded, properly processed, and pleasing to the ear … there’s really no need to attempt to correct any indication of asymmetry.

However if you are noticing abnormal displacement of energy, it may be worth looking into. My suggestion would be to evaluate your workflow and determine possible causes. Listen carefully for any indication of distortion. Often a slight EQ tweak or a console setting modification is all that may be necessary to make noticeable (audible) improvements to your audio.

-paul.

Intermediate File Format for New Media Producers: MP2

mp2-file If you are in the audio production business or involved in some sort of collaborative Podcast effort, moving large lossless audio files to and from various locations can be challenging.

Slow internet speeds, Hotel WiFi, and server bottlenecks have the potential to cripple efficient file management and ultimately impede timely delivery. And let’s not forget how quickly drive space can diminish when storing WAV and/or AIFF files for archival purposes.

The Requirements for a Suitable Intermediate

From the perspective of a Spoken Word New Media Producer, there are two requirements for Intermediate files: Size Reduction and Retention of Fidelity. The benefits of file size reduction are obvious. File transfers originating from locations with less than ideal connectivity would be much more efficient, and the consumption of local or remote disk/server space would be minimized. The key here is to use a flexible lossy codec that will reduce file sizes AND hold up well throughout various stages of encoding and decoding.

Consider the possible benefits of the following client/producer relationship: A client converts (encodes) lossless files to lossy and delivers the files to the producer via FTP, DropBox, etc. The Producer would then decode the files back to their original format in preparation for post production.

When the work is completed, the distribution file is created and delivered (in most cases) as an MP3. Finally with a bit of ingenuity, the producer can determine what needs to be retained for archival purposes, and convert these files back to the intermediate format for long term storage.

How about this scenario: Podcast Producer A is located in L.A.. Producer B is located in NYC. Producer B handles the audio post for a double-ender that will consist of 2 individual WAV files recorded locally at each location.

DA

Upon completion of a session, the person in L.A must send the NY based audio producer a copy of the recorded lossless audio. The weekly published program typically runs upwards of 60 minutes. Needless to say the lossless files will be huge. Let’s hope the sender is not in a Hotel room or at Starbucks.

The good news is such a codec exists …

MPEG 1 Layer II (commonly referred to as MP2 with an .mp2 file extension) is in fact a lossy “perceptual” codec. What makes it so unique (by design) is the format’s ability to limit the introduction of artifacts throughout various stages of encoding and decoding. And get this – MP2’s check in at about 1/5th the size of a lossless source. For example a 30 minute (16 bit/44.1kHz) Stereo WAV file currently residing on my desktop is 323.5 megabytes. It’s MP2 counterpart is 58.7 megabytes.

Public Radio

If you look into the file submission requirements over at PRX (The Public Radio Exchange) and NPR (see requirements), you will notice MP2 audio files are what they ask for.

In fact during the early days of IT Conversations, founder and Executive Director Doug Kaye implemented the use of MP2 audio files as intermediates throughout the entire network based on recommendations by some of the most prominent engineers in the Public Radio space. We expected our show producers and content providers to convert their audio files to MP2 prior to submission to our servers using third party software applications.

Eventually a proprietary piece of software (encoder/uploader) was developed and distributed to our affilates. The server side MP2’s were downloaded by our audio engineers, decoded to lossless, produced, and then sent back up to the network as MP2 in preparation for server side distribution encoding (MP3).

From a personal perspective I was so impressed with the codec’s performance, I immediatly began to ask my clients to submit MP2 audio files to me, and I’ve never looked back. I have never experienced a noticeable degradation of audio quality when converting a client’s MP2 back to WAV in preparation for post.

Storage

In my view it’s always a good idea to have unfettered access to all previously produced project files. Besides produced masters, let’s not forget the accumulation of individual project assets that were edited, saved, and mixed in post.

On average my project folders that include audio assets for a 30 minute program may consume upwards of 3 Gigabytes of storage space. Needless to say an efficient method of storage is imperative.

Fidelity Retention

If you are concerned about the possibility of audio quality degradation due to compression artifacts, well that’s understandable. In certain instances accessability to raw, uncompressed audio will be more suitable. However I am convinced that you will be impressed with how well MP2 audio files hold up throughout various workflows.

In fact try this: (Suggested encoders listed below)

Convert a stereo WAV file to stereo MP2 (256 kbps). Compare the file sizes. Listen to the MP2 and assess fidelity retention. Then convert the stereo MP2 directly to stereo MP3 (128 kbps). Listen for any indication of noticeable artifacts.

Let me know what you think …

My recommendation would be to first experiment with converting a few of your completed project assets to MP2 in preparation for storage. I’ve found that I rarely need to dig back into old work. I have on a few occasions, and the decoded MP2’s were perfectly fine. Note that I always save a copy of the produced lossless master.

Specifications and Software

The requirements for mono and stereo MP2 files:

Stereo: 256 kbps, 16 bit, 44.1kHz
Mono: 128 kbps, 16 bit, 44.1kHz

There are many audio applications that support MP2 encoding. Since I have limited exposure to Windows based software, the scope of my awareness is narrow. I do know that Adobe Audition supports the format. In the past I’ve heard that dBPowerAmp is a suitable option.

On the Mac side, besides the cross platform Audition – there is a handy utility on the Mac App Store called Audio-Converter. It’s practically free, priced at $0.99. File encoding is also supported in FFmpeg either from the Command Line or through various third party front ends.

Here is the syntax (stereo, then mono) for Command Line use on a Mac. The converted file will land on your Desktop, named Output.mp2:

ffmpeg -i yourInputFile.wav -acodec mp2 -ab 256k ~/Desktop/Output.mp2

ffmpeg -i yourInputFile.wav -acodec mp2 -ab 128k ~/Desktop/Output.mp2

Here’s a good place to download pre-compiled FFmpeg binaries.

Many modern media applications support native playback of MP2 audio files, including iTunes and Quicktime.

In Conclusion

If you are in the business of moving around large Spoken Word audio files, or if you are struggling with disk space consumption issues, the use of MP2 audio files as intermediates is a worthy solution.

-paul.

iZotope Ozone 6

iZotope has released a newly designed version of Ozone, their flagship Mastering processor. Notice I didn’t refer to Ozone [6] as a plugin? Well I’m happy to report that Ozone [6] is now capable to run independent of a DAW as a stand-alone desktop processor.

oz6-480

Besides the stand-alone option and striking UI overhaul, Ozone’s flexibility has been greatly enhanced with the addition of support to host third party Audio Units and VST plugins. Preliminary tests here indicate that it functions very well in the stand-alone mode. More on this in moment …

I’ve been a customer and supporter of iZotope since early 2005. If I remember correctly Ozone 3 was the first version that I had access to. In fact back in the early days of Podcasting, many producers purchased an Ozone license based on my endorsement. This was an interesting scenario all due to the fact that most of the people in the community who bought it – had no idea how to use it! And so a steady flow of user support inquiries began to trickle in.

I decided the best way to bring users up to speed was to design Presets. I would distribute the underlying XML file and have the users move it to the proper location on their system’s. After doing so, the Preset would be accessible within Ozone’s Preset Manager.

The complexity of the Presets varied. Some people wanted basic Band-Pass filters. Others requested the simulation of a broadcast chain that would result in a signature sound for their recorded voice. In fact I remember one particular instance where the user requested a Preset that would make him sound like an “AM Radio DJ”. So I went to work and I think I made him happy.

As Ozone matured, it’s level of complexity increased resulting in somewhat sluggish performance (at least for me). When iZotope released Alloy 2, I bought it – and found it to be much more responsive. And so I sort of moved away from Ozone, especially Ozone 5. My guess is if my system’s were a bit more robust, poor performance would be less of an issue. Note that my personal experience with Ozone was not necessarily the general concensus. Up to this latest release, the plugin was highly regarded with widespread use in the Mastering community.

Over the past 24 hours I’ve been paying close attention to how Ozone users are reacting to this new version. Note that a few key features have been removed. The Reverb module is totally gone. Gating/Expansion has been removed from the Dynamics Module, and the Dithering options have been minimized. The good news is these particular features are not game changers for me based on how I use this tool. I will say the community reaction has been tepid. Some users are passing on the release due to the omissions that I’ve mentioned and others that I’m sure I’ve overlooked.

For me personally – the $99 upgrade was a no-brainer. In my view the stand-alone functionality and the support for third party plugins makes up for what has been removed. In stand-alone mode you can import multiple files, save your work as projects, implement processing chains in a specific order, apply head/tail cuts/fades, and export your work.

Ozone [6] will accept WAV, AIFF, or MP3 files. If you are exporting to lossless, you can convert Sample Rates and apply Dither. This all worked quite well on my 2010 MacPro. In fact the performance was quite good, with no signs of sluggish performance. I did notice some problematic issues with plugin wrappers not scaling properly. Also the Plugin Manager displayed duplicates of a few plugins. This did not hinder performance in any way. In fact all of my plugins functioned well.

And so that’s my preliminary take. My guess is this new version of Ozone is well suited for advanced New Media Producers who have a basic understanding of how to process audio dynamics and apply EQ. Of course there’s much more to it, and I’m around to answer any questions that you might have.

Look for more information in future posts …

-paul.

Podcast Loudness: Mono vs. Stereo Perception …

Consider the following scenario:

Two copies of an audio file. File 1 is Stereo, Loudness Normalized to -16.0 LUFS. File 2 is Mono, also Loudness Normalized to -16.0 LUFS.

Passing both files through a Loudness Meter confirms equal numerical Program Loudness. However the numbers do not reflect an obvious perceptual difference during playback. In fact the Mono file is perceptually louder than it’s Stereo counterpart.

Why would the channel configuration affect perceptual loudness of these equally measured files?

mono-LN-480

The Explanation

I’m going to refer to a feature that I came across in a Mackie Mixer User Manual. Mackie makes reference to the “Constant Loudness” principle used in their mixers, specifically when panning Mono channels.

On a mixer, hard-panning a Mono channel left or right results in equal apparent loudness (perceived loudness). It would then make sense to assume that if the channel was panned center, the output level would be hotter due to the combined or “mixed” level of the channel. In order to maintain consistent apparent loudness, Mackie attenuates center panned Mono channels by about 3 dB.

We can now apply this concept to the DAW …

A Mono file played back through two speakers (channels) in a DAW would be the same as passing audio through a Mono analog mixer channel panned center. In this scenario, the analog mixer (that adheres to the Constant Loudness principle) would attenuate the output by 3dB.

In order to maintain equal perception between Loudness Normalized Stereo and Mono files targeting -16.0 LUFS, we can simulate the Constant Loudness principle in the DAW by attenuating Mono files by 3 LU. This compensation would shift the targeted Program Loudness for Mono files to -19.0 LUFS.

To summarize, if you plan to Loudness Normalize to the recommend targets for internet/mobile, and Podcast distribution … Stereo files should target -16.0 LUFS Program Loudness and Mono files should target -19.0 LUFS Program Loudness.

Note that In my discussions with leading experts in the space, it has come to my attention that this approach may not be sustainable. Many pros feel it is the responsibility of the playback device and/or delivery system to apply the necessary compensation. If this support is implemented, the perceived loudness of -16.0 LUFS Mono will be equal to -16.0 LUFS Stereo. There would be no need to apply manual compensation.

-paul.

Loudness Meter Descriptors …

In the recent article published on Current.org “Working Group Nears Standard for Audio Levels in PRSS Content”, the author states:

“Working group members believe that one solution may lie in promoting the use of Loudness Meters, which offer more precision by measuring audio levels numerically. Most shows are now mixed using peak meters, which are less exact.”

Peak Meters are exact – when they are used to display what they are designed to measure:Sample Peak Amplitude. They do not display an accurate representation of average, perceived loudness over time. They should only be used to monitor and ultimately prevent overload (clipping).

It’s great that the people in Public Radio are finally addressing distribution Loudness consistency and compliance. My hope is their initiative will carry over into their podcast distribution models. In my view before any success is achieved, a full understanding of all spec. descriptors and targets would be essential. I’m referring to Program (Integrated) Loudness, Short Term Loudness, Momentary Loudness, Loudness Range, and True Peak.

Loudness Meter

A Loudness Meter will display all delivery specification descriptors numerically and graphically. Meter descriptors will update in real time as audio passes through the meter.

Short Term Loudness values are often displayed from a graphical perspective as designed by the developer. For example TC Electronic’s set of meters (with the exception of the LM1n) display Short Term Loudness on a circular graph referred to as Radar. Nugen Audio’s VisLM meter displays Short Term Loudness on a grid based histogram. Both versions can be customized to suit your needs and work equally well.

meters-480

Loudness Meters also include True Peak Meters that display any occurrences of Intersample Peaks.

Descriptors

All Loudness standardization guidelines specify a Program Loudness or “Integrated Loudness” target. This time scaled descriptor indicates the average, perceived loudness of an entire segment or program from start to finish. It is displayed on an Absolute scale in LUFS (Loudness Units relative to Full Scale), or LKFS (Loudness Units K Weighted relative to Full Scale). Both are basically the same. LUFS is utilized in the EBU R128 spec. and LKFS is utilized in the ATSC A/85 spec. What is important is that a Loudness Meter can display Program Loudness in either LUFS or LKFS.

The Short Term Loudness (S) descriptor is measured within a time window of 3 seconds, and the Momentary Loudness (M) descriptor is measured within a time window of 400 ms.

The Loudness Range (LRA) descriptor can be associated with dynamic range and/or loudness distribution. It is the difference between average soft and average loud parts of an audio segment or program. This useful indicator can help operators decide whether dynamic range compression is necessary.

Gating

The specification Gate (G10) function temporarily pauses loudness measurements when the signal drops below a relative threshold, thus allowing only prominent foreground sound to be measured. The relative threshold is -10 LU below ungated LUFS. Momentary and Short Term measurements are not gated. There is also a -70 LUFS Absolute Gate that will force metering to ignore extreme low level noise.

Absolute vs. Relative

I mentioned that LUFS and LKFS are displayed on an Absolute scale. For example the EBU R128 Program Loudness target is -23.0 LUFS. For Podcast/Internet/Mobile the Program Loudness target is -16.0 LUFS.

There is also a Relative scale that displays LU’s, or Loudness Units. A Relative LU scale corresponds to an Absolute LUFS/LKFS scale, where 0 LU would equal the specified Absolute target. In practice, -23 LUFS in EBU R128 is equal to 0 LU. For Podcast/Mobile -16.0 LUFS would also be equal to 0 LU. Note that the operator would need to set the proper Program Loudness target in the Meter’s Preferences in order to conform.

ab-rel

LU and dB Relationship

1 LU is equal to 1 dB. So for example you may have measured two programs: Program A checks in at -20 LUFS. Program B checks in at -15 LUFS. In this case program B is +5 LU louder than Program A.

Placement

Loudness Meter plugins mainly support online (Real Time) measurement of an audio signal. For an accurate measurement of Program Loudness of a clip or mixed segment the meter must be inserted in the DAW at the very end of a processing chain, preferably on the Master channel. If the inserts on the Master channel are post fader, any change in level using the Master Fader will result in a global gain offset to the entire mix. The meter would then (over time) display the altered Program Loudness.

If your DAW’s Master channel has pre fader inserts, the Loudness Meter should still be inserted on the Master Channel. However the operator would first need to route the mix through a Bus and use the Bus channel fader to apply global gain offset. The mix would then be routed to the Master channel where the Loudness Meter is inserted.

If your DAW totally lacks inserts on the Master channel, Buses would need to be used accordingly. Setup and routing would depend on whether the buses are pre or post fader.

Some Loudness Meter plugins are capable of performing offline measurements in certain DAW’s on selected regions and/or clips. In Pro Tools this would be an Audio Suite process. You can also accomplish this in Logic Pro X by initiating and completing an offline bounce through a Loudness Meter.

-paul.

Audition CC: Loudness Normalization Pt.2 …

In my previous article I discussed various aspects of the Match Volume Processor in Adobe Audition CC. I mentioned that the ITU Loudness processing option must be used with care due to the lack of support for a user defined True Peak Ceiling.

I also pointed to a video tutorial that I produced demonstrating a Loudness Normalization Processing Workflow recommended by Thomas Lund. It is the off-line variation of what I documented in this article.

Here’s how to implement the off-line processing version in Audition CC …

This is a snapshot of a stereo version of what may very well be the second most popular podcast in existence:

Amplitude Statistics in Audition:

Peak Amplitude:0dB
True Peak Amplitude:0.18dBTP
ITU Loudness:-15.04 LUFS

source-(480)

It appears the producer is Peak Normalizing to 0dBFS. In my opinion this is unacceptable. If I was handling post production for this program I would be much more comfortable with something like this at the source:

Amplitude Statistics in Audition:

Peak Amplitude:-0.81dB
True Peak Amplitude:-0.81dBTP
ITU Loudness:-15.88 LUFS

intermediate-(480)

We will be shooting for the Internet/Mobile/Podcast target of -16.0 LUFS Program Loudness with a suitable True Peak Ceiling.

The first step is to run Amplitude Statistics and determine the existing Program Loudness. In this case it’s -15.88 LUFS. Next we need to Loudness Normalize to -24.0 LUFS. We do this by simply calculating the difference (-8.1) and applying it as a Gain Offset to the source file.

The next step is to implement a static processing chain (True Peak Limiter and secondary Gain Offset) in the Audition Effects Rack. Since these processing instances are static, save the Effects Rack as a Preset for future use.

Set the Limiter’s True Peak Ceiling to -9.5dBTP. Set the secondary Gain Offset to +8dB. Note that the Limiter must be inserted before the secondary Gain Offset.

Process, and you are done.

In this snapshot the upper waveform is the Loudness Normalized source (-24.0 LUFS). The lower waveform in the Preview Editor is the processed audio after it was passed through the Effects Rack chain.

lund-method-(480)

In case you are wondering why the Limiter is before the secondary Gain instance – in a generic sense, if you start with -9.5 and add 8, the result will always be -1.5. This translates into the Limiter doing it’s job and never allowing the True Peaks in the audio to exceed -1.5dBTP. In essence this is the ultimate Ceiling. Of course it may be lower. It all depends on the state of the source file.

This last snapshot displays the processed audio that is fully compliant, followed by it’s Amplitude Statistics:

normalized-(480)

stats-audition

In Summary:

[– Determine Program Loudness of the source (Amplitude Statistics).

[– Loudness Normalize (Gain Offset) to -24.0 LUFS.

[– Run your saved Effects Rack chain that includes a True Peak Limiter (Ceiling set to -9.5dBTP) and a secondary +8dB Gain Offset.

Feel free to ping me with questions.

-paul.

Audition CC: Loudness Normalization …

*** UPDATE: Please note this post was written in 2014. The current version of Adobe Audition CC has been greatly enhanced, specifically in regards to the Match Loudness Module. It is now possible to define a True Peak Maximum, as well as Integrated/Program Loudness targets. It is also possible to customize Loudness Normalization Tolerence.

Adobe Audition CC has a handy Match Volume Processor with various options including Match To/ITU-R BS.1770-2 Loudness. The problem with this option is the Processor will not allow the operator to define a True Peak Ceiling. And so depending on various aspects of the input file, it’s possible the processed audio may not comply due to an unsuitable Peak Ceiling.

For example if you need to target -16.0 LUFS Program Loudness for internet/mobile distribution, the Match Volume Processor may need to increase gain in order to meet this target. Any time a gain increase is applied, you run the risk of pushing the Peak Ceiling to elevated levels.

The ITU Loudness processing option does supply a basic Limiting option. However – it’s sort of predefined. My tests revelaled Peak Ceilings as high as -0.1dBFS. This will result in insufficient headroom for both True Peak compliance and preparation for MP3 encoding.

The Audition Match Volume Processor also features a Match To/True Peak Amplitude option with a user defined True Peak Ceiling (referred to as Peak Volume). This is essentially a True Peak Limiter that is independent of the ITU Loudness Processor. For Program Loudness and True Peak compliance, it may be necessary to run both processing stages sequentially.

processor

There are a few caveats …

[– If the Match Volume Processor (Match To/ITU-R BS.1770-2 Loudness) applies limiting that results in a Peak Ceiling close to full scale, any subsequent limiting (Match To/True Peak Amplitude) has the potential to reduce the existing Program Loudness.

[– If a Match Volume process (Match To/ITU-R BS.1770-2 Loudness) yields a compliant True Peak Ceiling right out of the box, there is no need to run any subsequent processing.

Conclusion

If you are going to use these processing options, my suggestion would be to make sure the measured Program Loudness of your input file is reasonably close to the Program Loudness that you are targeting. Also, make sure the input file has sufficient headroom, with existing True Peaks well below 0dBFS.

If you are finding it difficult to achieve acceptable results, I suggest you apply the concepts described in this video tutorial that I produced. I demonstrate a sort of manual “off-line” Loudness Normalization process. If you prefer to handle this in real time (on-line), refer to my article “Podcast Loudness Processing Workflow.”

-paul.

Skype in the Box …

Scenario:

Studio Host and Skype participant to be recorded inside your DAW utilizing a slightly advanced configuration.

The session will require a proper mix-minus using your mixer’s Aux Send to feed the Skype Input – minus the Skype participant.

Objectives:

[– Two discrete mono Host/participant recordings with minimal or no processing.

[– Host Mic routed through a voice processing chain using plugins.

[– Incoming Skype routed through a compressor to tame levels, if necessary.

[– One fully processed stereo mix of the session with the Host audio on the left channel and the Skype participant on the right channel.

[– Real time recording and output.

There are certainly various ways to accomplish these objectives utilizing a Bounce to Track concept. The optional inserted plugins and even the routing decisions noted below are entirely subjective. And success with this implementation will depend on how resourceful your system is. I would recommend that you send the session audio out in real time to an external recorder for backup.

Configuration:

This particular example works well for me in Pro Tools. I tried to make this design as generic as possible. My guess is you will have no trouble applying these concepts in any professional DAW. (Click to enlarge)

Skype-NEW-480

Setup:

First I’ll mention that I’m using a Mackie Onyx 1220i Firewire Mixer. This device is defined as my default system I/O. The mixer has a sort nifty feature that allows the creation of a mix-minus just by the press of a button.

onyx-480

Pressing the Input button located on the mixer’s Line In 11-12 channel(s) sets the computer’s audio output as the channel’s input, passing the signal through Firewire 1-2. Disengaging this button will set the Input(s) to Line and the channels’s 1/4″ Input jacks would become active.

Skype recognizes the mixer as the default I/O. So I plug my mic into the mixer’s Channel 1 Input and hard-pan left. I then hard-pan Channel(s) 11-12 right. With the Input button pressed – I can hear Skype. In order to create a successful mix-minus you need to tell the mixer to prevent the Skype input from being inserted back into the Main Mix. These options are located in the mixer’s Source Matrix Control area.

This configuration translates into a Pro Tools session by setting the Track 1 Input (mono) to Onyx Channel 1 and the Track 2 Input (mono) to Onyx Channel 12. I now have discrete channels of audio coming into Pro Tools on independent tracks.

Typically I insert noise reduction plugins on the Mic Input Channel. A Gate basically mutes the channel when there is no signal, and iZotope’s Dialog DeNoiser handles problematic broadband noise in real time. At this stage the Skype Input is recorded with no processing.

Next, both Input Channels are bused out to independent mono Auxiliary Inputs that are hard-panned left + right respectively in preparation to route the passing audio to a Stereo Record bus. To process the mic signal passing through Aux 1 I usually insert something like Waves MaxxVolume, FabFilter’s Pro-DS, and Avid’s Impact Compressor.

For the Skype audio passing through Aux 2, I might insert a gain stage plugin and another instance of Avid’s Impact Compressor. This would keep the Skype audio in check in the event the guest’s delivery is problematic.

The last step is to bus out the processed audio to a Stereo Audio Track with it’s channels hard-panned left + right. This will maintain the channel separation that we established by hard-panning the Aux Inputs. On this track I may insert a Loudness Maximizer and a Peak Limiter. The processed and recorded stereo file will contain the Mic audio on the Left Channel and the Skype audio on the Right Channel.

Finally you’ll notice I have a Loudness Meter inserted on the Master in one of the Pro Tools Post Fader inserts. Once a session is completed I can disarm the “Record” track and monitor the stereo mixdown. Since the Loudness Meter will be operating Post Fader, I can apply a global gain offset using the Master Fader. Output measurements will be accurate. Of course at this point the channels that contain the original discrete mono recordings would need to be muted.

Notes

All the recording and processing steps in this session can be executed in real time. You simply define your Inputs, add Inserts, set up panning/routing, and finally arm your tracks to record. You will be able to converse with the Skype guest as you monitor the session through the mixer’s headphone output with no latency issues. When the session ends you will have access to independent mono recordings for both participants and a processed stereo mix with discrete channels.

Note that you can also implement this workflow as a two step process by first recording the Host/Skype session as discrete mono files. Then Bounce to Track (or Disk) to create the stereo mixdown.

Again the efficiency of this workflow will depend on how resourceful your system is. You might consider running Skype on a separate computer. And I reiterate: as you record in the box, consider sending the session audio out to an external recorder for backup.

-paul.

Podcasting System featuring the Allen & Heath XB-10 Console …

I continue to look around for a Broadcast Console that would be suitable to replace my trusty Mackie Onyx 1220i FW mixer. I was always aware of the XB-10 by Allen & Heath, although I did not pay much attention to it due to it’s use of pot-styled channel faders as opposed to sliding (long-throw) faders.

ah-mixer-480

Last evening I skimmed through the manual for the XB-10. Looking past the pot-styled fader issue this $799 console is packed with features that make it highly attractive. And it’s smaller than my Mackie, checking in at 13.2 inches wide x 10 inches deep. Allen & Heath also offers the XB-14-2 Console. It checks in at 15.2 inches wide x 18.3 inches deep with ample surface space for long-throw sliding faders. Bottom line is it’s larger than my Mackie and the size just doesn’t work for me.

XB-10: The Basics

Besides all the useful routing options, the XB-10 has a dedicated Mix-Minus channel that can be switched to receive the output of a Telephone Hybrid or the output of the bi-directional USB bus. In this case it would be easy to receive a Skype guest from a computer.

The console has latching On/Off switches on all input channels, supports pre-fader listening, and has built-in Compressors on channels 1-3. The manual states ” … the Compressor is optimized to reduce the dynamic range of the presenter microphone(s). Low signal levels are given a 10dB gain boost. Soft Knee compression activates at -20dBu, and higher level signals are limited.” Personally I would use a dedicated voice processor for the main presenter. However having the dynamics processing on-board is a useful feature, especially when adding additional presenters to the program mix.

The XB-10 is also equipped with an Output Limiter that can be used to ensure that the final mix does not exceed a predefined level. There is an activation switch located on the back panel of the device with a trim pot control to set the limiting threshold. If the Limiter is active and functioning, a front panel LED illuminates.

One other feature that is worth mentioning is the Remote Connector interface located on the back of the device. This can be used to implement CD player remote triggering, ON AIR light illumination, and external metering options.

I decided to design a system using the XB-10 as the controller that is suitable for flexible Podcast Production and Recording. Bear in mind I don’t have any of these system components on hand except for older versions of the dbx Voice Processor and the Telos Phone Hybrid. I also have a rack-mounted Solid State Recorder by Marantz, similar to the Tascam. I’m confident that all displayed components would work well together yielding excellent results.

Also note there are many ways to integrate these components within the system in terms of connections and routing. This particular design is similar in concept to how I have my current system set up using the components that I currently own (Click to Enlarge).

AH-system-480

System Design Concepts and Selections

The mic of choice is the Shure SM7B. The was the first broadcast style mic that I bought back in 2004 and it’s one of my prized possessions. As far as I’m concerned it’s the most forgiving broadcast mic available, with one caveat – it requires a huge amount of clean gain to drive it. Common +60dB gain trims on audio mixers will not be suitable, especially when setting the gain near or at it’s highest level. This will with no doubt result in problematic noise.

In my current system I plug my dynamic mic(s) into my dbx 286a Voice Processor (mic input) and then route the processor’s line output to a line input on one of the Mic channels on my Mackie mixer. By doing so I pick up an additional +40dB of available gain to drive the mic. Of course this takes a bit of tweaking to get the right balance between the gain setting on the processor and the gain setting on the Mackie. The key is not to max out either of the gain stages.

I’ve recreated this chain in the new design using the updated dbx 286s. In doing so the primary presenter gets the voice processor on her channel. If there is the necessity to expand the system by introducing a second presenter, I’ve implemented the Cloudlifter CL-1 gain stage between the mic and the console’s mic input on channel 2. The CL-1 will provide up to +20dB of additional clean gain when using any passive microphone. Finally I point to the availability of the on-board dynamics processor and consider this perfectly suitable for a second presenter.

I mentioned the XB-10 has a dedicated telephone interface channel with a built in mix-minus. Once again I’ve selected the Hx1 Digital Telephone Hybrid by Telos Systems for use in this system. The telephone interface channel can be set to receive an incoming telephone caller or something like the Skype output coming in from a computer. I’ve taken this a step further by also implementing an analog Skype mix-minus using the Console’s Aux Send to feed the computer input. The computer output is routed back into the Console on an available channel(s).

As noted the USB interface on the Console is bi-directional. One use case scenario would be to use the computer USB output to send sound effects and audio assets into the program mix. (I am displaying QCart for Mac as a possible option).

The rest is pretty self explanatory. I’m using the Monitor output bus to feed the studio speakers. The Console’s Main outputs are routed to the Tascam recorder, and it’s outputs are routed to an available set of inputs on the Console.

Like I said I’m fairly confident this system design would be quite functional and well suited for flexible Podcast Production and Recording.

In closing beginning in 2004 besides designing sort of generic systems based on various levels of cost and complexity, it was common for an aspiring Podcast Producer to reach out to me and ask for technical assistance with the components they purchased. In this case I would build detailed diagrams for the producer much the same as the example included in this post. A visual representation of system routing and configuration is a great way to expidite setup when and if the producer who purchased the gear is overwhelmed.

Note:

At one time I was providing a service where two individual participants were simultaneously calling into my studio for interview session recording. Since I had two dedicated phone lines and corresponding telephone hybrids, the participants were able two converse with each other using 2 Aux buses, in essence by creating two individual mix-minuses.

Here is the original diagram that I built in October 2006 that displays the routing of the callers via Aux sends:

dual-mm-480

Even though the XB-10 console contains a single Aux bus, a similar configuration may still be possible where an incoming caller from the telephone hybrid would be able to converse with a Skype guest, minus themselves. I need to read into this further before I am able to make a determination on whether this is supported.

Components:

[– Shure SM7B Broadcast Dynamic Microphone
[– Cloudlifter CL-1 Gain Stage
[– Allen & Heath XB-10 Broadcast Console
[– dbx 286s Voice Processor
[– Telos Hx1 Digital Telephone Hybrid
[– Tascam SS-R200 Solid State Recorder

Optional:

[– QCart for Mac OSX
[– KRK Rokit 5 Powered Studio Monitors

-paul.

Podcast Loudness Processing Workflow …

Below is Elixir by Flux. This is an ITU-R BS.1770/EBU R128 compliant multichannel True Peak Limiter. It’s just one of the tools available that can be used in the workflow described below. In this post I also mention the ISL True Peak Limiter by Nugen Audio.

If you have any questions about these tools or Loudness Meters in general, ping me. In fact I think my next article will focus on the importance of learning how to use a Loudness Meter, so stay tuned …

elixir

In my previous post I made reference to an audio processing workflow recommended by Thomas Lund. The purpose of this workflow is to effectively process audio files targeting loudness specifications that are suitable for internet and mobile distribution. in other words – Podcasts.

My first exposure to this workflow was reading “Managing Audio Loudness Across Multiple Platforms” written by Mr. Lund and included in the January 2013 edition of Broadcast Engineering Magazine.

Mr. Lund states:

“Mobile and computer devices have a different gain structure and make use of different codecs than domestic AV devices such as television. Tests have been performed to determine the standard operating level on Apple devices.

Based on 1250 music tracks and 210 broadcast programs, the Apple normalization number comes out as -16.2 LKFS (Loudness, K-weighted, relative to Full Scale) on a BS.1770-3 scale.

It is, therefore, suggested that when distributing Podcast or Mobile TV, to use a target level no lower than -16 LKFS. The easiest and best-sounding way to accomplish this is to:

[– Normalize to target level (-24 LKFS)

[– Limit peaks to -9 dBTP (Units for measurement of true peak audio level, relative to full scale)

[– Apply a gain change of +8 dB

Following this procedure, the distinction between foreground and background isn’t blurred, even on low-headroom platforms.”

Here is my interpretation of the steps referenced in the described workflow:

Step 1 – Normalize to target level -24.0 LUFS. (Notice Mr. Lund refers to LKFS instead of LUFS. No worries. Both are the same. LKFS translates to Loudness Units K-Weighted relative to Full Scale).

So how do we accomplish this? Simple – the source file needs to be measured and the existing Program Loudness needs to be established. Once you have this descriptor, it’s simple math. You calculate the difference between the existing Program Loudness and -24.0. The result will give you the initial gain offset that you need to apply.

I’ll point to a few off-line measurement utilities at the end of this post. Of course you can also measure in real time (on-line). In this case you would need to measure the source in it’s entirety in order to arrive upon an accurate Program Loudness measurement.

Keep in mind since random Program Loudness descriptors at the source will vary on a file to file basis, the necessary gain offset to normalize will always be different. In essence this particular step is variable. Conversely steps 2 and 3 in the workflow are static processes. They will never change. The Limiter Ceiling will always be -9.0 dBTP, and the final gain stage will always be + 8dB. The -16.0 LUFS target “math” will only work if the Program Loudness is -24.0 LUFS at the very beginning from file to file.

Think about it – with the Limiter and final gain stage never changing, – if you have two source files where file A checks in at -19.0 LUFS and File B checks in at -21.0 LUFS, the processed outputs will not be the same. On the other hand if you always begin with a measured Program Loudness of -24.0 LUFS, you will be good to go.

Examples:

[– If your source file checks in at -20.0 LUFS … with -24.0 as the target, the gain offset would be -4.0 dB.

gain

[– If your source file checks in at -15.6 LUFS … with -24.0 as the target, the gain offset would be -8.4 dB.

[– If your source file checks in at -26.0 LUFS … with -24.0 as the target, the gain offset would be +2.0 dB.

[– If your source file checks in at -27.3 LUFS … with -24.0 as the target, the gain offset would be +3.3 dB

In order to maintain accuracy, make sure you use the float values in the calculation. Also – it’s important to properly optimize the source file (see example below) before performing Step 1. I’m referring to dynamics processing, equalization, noise reduction, etc. These options are for the most part subjective. For example if you prefer less compression resulting in wider dynamics, that’s fine. Handle it accordingly.

Moving forward we’ve established how to calculate and apply the necessary gain offset to Loudness Normalize the source audio to -24.0 LUFS. On to the next step …

Step 2 – Pass the processed audio through a True Peak Limiter with it’s Peak Ceiling set to -9.0 dBTP. Typically I set the Channel or “Stereo” Link to 100%, limiting Look Ahead to 1.5ms and Release Time to 150ms.

Step 3 – Apply +8dB of gain.

You’re done.

You can set this up as an on-line process in a DAW, like this:

Lund-480

I’m using the gain adjustment feature in two instances of the Avid Time Adjuster plugin for the initial and final gain offsets. The source file on the track was first measured for Program Loudness. The necessary offset to meet the initial -24.0 LUFS target was -4 dB.

The audio then passes through the Nugen ISL True Peak Limiter with it’s Peak Ceiling set to -9.0 dBTP. Finally the audio is routed through the second instance of the Adjuster plugin adding +8 dB of gain. The Loudness meter displays the Program Loudness after 5 minutes of playback and will accurately display variations in Program Loudness throughout. Bouncing this session will output to the Normalized targets.

Note that you can also apply the initial gain offset, the limiting, and the final gain offset as independent off-line processes. The preliminary measurement of the audio file and gain offset are still required.

Example Workflow

Review the file attributes:

measurements-480
source_480

The audio is fairly dynamic. So I apply an initial stage of compression:

Intermediate-480

Next I apply additional processing options that I feel are necessary to create a suitable intermediate. I reiterate these processing options are entirely subjective. Your desire may be to retain the Loudness Range and/or dynamic attributes present in the original file. If so you will need to process the audio accordingly.

Here is the intermediate:

processed-stats-480
Processed-480

The Program Loudness for this intermediate file is -20.2 LUFS. The initial gain offset required would be -3.8 dB before proceeding.

After applying the initial gain offset, pass the audio through the limiter, and then apply the final gain stage.

This is the resulting output:

normalized-specs-480
new-loudness-normalized

That’s about it. We’re at -16.0 LUFS with a suitable True Peak Max.

I’ve experimented with this workflow countless times and I’ve found the results to be perfectly acceptable. As I previously stated – preparation of your source or intermediate file prior to implementing this three step process is subjective and totally up to you. The key is your output will always be in spec..

Offline Measuring Tools

I can recommend the following tools to measure files “off-line.” I’m sure there are many other options:

[– The new Loudness Meters by TC Electronic support off-line measurements of selected audio clips in Pro Tools (Audio Suite).

[– Auphonic Leveler Batch Processor. I don’t want to discount the availability and effectiveness of the products and services offered by Auphonic. It’s a highly recommended web service and the standalone application that includes high quality audio processing algorithms including Loudness Normalization.

[– Using FFmpeg from the command line.

Example syntax:

ffmpeg -nostats -i yourSourceFile.wav -filter_complex ebur128=peak=true -f null –

[– Using r128x from the command line.

Example syntax:

r128x yourSourceFile.wav

Note there is a Mac only front end (GUI) version of r128x available as well.

-paul.

Fresh Air Podcast: Audio Analysis …

In my No Free Pass for Podcasts post I talked about why the Broadcast Loudness specs. are not necessarily suitable for Podcasts. I noted that the Program Loudness targets for EBU R128 and ATSC A/85 are simply too low for internet and mobile audio distribution. Add excessively dynamic audio to the mix and it will complicate matters further, especially when listeners use mobile devices to consume their media in less than ideal ambient spaces.

fa-processed

Earlier today I was discussing this issue with someone who is well versed in all aspects audio production and loudness processing. He noted that ” … the consensus of it all is, that it is a bad idea to take a really nice standard that leaves plenty of headroom and then start creating new standards with different reference values.” The fix would be to “keep production and storage at -23.0 LUFS and then adjust levels in distribution.” Valid points indeed. However in the real world this mindset is unrealistic, especially in the internet/mobile/Podcasting space.

The fact of the matter is there is no way to avoid the necessity to revise the standards that simply do not work on a platform that consists of unique variables.

And so considering these variables, the implementation of thoughtful, revised, best practices that include platform specific targets for Program Loudness, Loudness Range, and True Peak are unavoidable. Independent Podcasters and network driven Podcasts using arbitrary production techniques and delivery methods simply need direction and guidance in order to comply. In the end it’s all about presenting well produced media to the listener.

Recently I came across a tweet where someone stated “I love the show but it is consistently too quiet to listen to on my phone.” They were referring to the NPR program Fresh Air. I’m not exactly sure if this person was referring to the radio broadcast stream or the distributed Podcast. Either way it’s an interesting assertion that I can directly relate to.

I subscribe to the Fresh Air Podcast. This will probably not surprise you – I refuse to listen to the Podcast right out of the box. When a new show pops up in Instacast, I download the file, decode to WAV, convert to stereo, and then reprocess the audio. I tweak the dynamic range and address show participant audio level variations using various plugins. I then bump things up to -16.0 LUFS (using what I like to refer to as “The Lund Method”) while supplying enough headroom to comply with -1.0 dBTP as my ultimate ceiling. I’ll get into the specifics in a future post.

According to the leading expert Mr. Thomas Lund:

“Mobile and computer devices have a different gain structure and make use of different codecs than domestic AV devices such as television. Tests have been performed to determine the standard operating level on Apple devices. Based on 1250 music tracks and 210 broadcast programs, the Apple normalization number comes out as -16.2LKFS (Loudness, K-weighted, relative to Full Scale) on a BS.1770-3 scale.

It is, therefore, suggested that when distributing podcast or Mobile TV, to use a target level no lower than -16LKFS. The easiest and best-sounding way to accomplish this is to: 1) Normalize to target level (-24LKFS); 2) Limit peaks to -9dBTP (Units for measurement of true peak audio level, relative to full scale); and 3) Apply a gain change of +8dB. Following this procedure, the distinction between foreground and background isn’t blurred, even on low-headroom platforms.”

In this snapshot I demonstrate the described workflow. I’m using two independent instances of the bx_control plugin to apply the gain offsets at various stages of the signal flow. After the initial calculated offset is applied, the audio is routed through the Elixr True Peak Limiter and then out through the second instance of bx_control applying +8dB of static gain. You can also replicate this workflow on an off-line basis. Note that I’ve slightly altered the limiting recommendation.

Lund-small

So why do I feel the need to do this?

Podcast Source

These are the specs. and the waveform overview of a recently published Fresh Air Podcast in it’s entirety:

raw-specs
fa-source-complete

Next is a 3 min. audio segment lifted from the published Podcast. The stats. display measurements of the attached 3 min. segment:

source_revised
source-1

Podcast Optimized for Internet/Mobile

Below is the same 3 min. segment. I reprocessed the audio to make it suitable for Podcast distribution. The stats. display measurements of the attached audio segment:

web-specs-2
source-2

The difference between the published source audio and the reprocessed version is quite obvious. The Loudness Normalized audio is so much more intelligible and easier to listen to. In my view the published audio is simply out of spec. and unsuitable for a Podcast.

Bear in mind the condition of the source audio is not uncommon. The problems that persist are not exclusive to podcasts distributed by NPR or by any of their affiliates. Networks with global reach need to recognize their Podcast distribution platforms as important mechanisms to expand their mass appeal.

It has been noted that the Public Radio community in general is exploring ways to enhance the way in which they produce their programs with focus on loudness standardization. My hope hope is this carries over to their Podcast platforms as well.

-paul.

For more information please refer to “Managing Audio Loudness Across Multiple Platforms” by Thomas Lund at TVTechnology.com.

No Free Pass for Podcasts …

I think it was in the mid to late 1980’s. I was still living home, totally fixated on what was happening with Television devices, programming and transmission. Mainly the advent of MTS Stereo compatible TV’s and VCR’s. I remember waiting patiently for weekly episodes of programs like Miami Vice and Crime Story to air. I would pipe the program audio through my media system in glorious MTS stereo. For me this was a game changer.

vice

I also remember it was around the same time that Cable TV became available in the area. I convinced my Mom and Dad to allow me to order it. Initially it was installed on the living room TV, and eventually made it’s way on to additional TV’s throughout our home. For the most part it was a huge improvement in terms of reception and of course program diversity.

However there was one issue that struck me from the very beginning: the wide variations in loudness between network TV Shows, Movies, and Adverts. In fact it was common for targeted, poorly produced, and exceedingly loud local commercials to air repeatedly throughout broadcast transmissions. Reaching for the remote to apply volume attenuation was a common occurrence and a major annoyance.

Obviously this was not isolated. The issue was widespread and resulted in a public outcry to correct these inconsistencies. In 2010 The CALM Act was implemented. The United States and Europe (and many other regions) adopted and now regulate loudness standardization guidelines for the benefit of the public at large.

If there is anyone out there who cannot relate to this “former” problem, I for one would be very surprised.

Well guess what? We now have the same exact problem existing on the most ubiquitous media distribution platform in existence – the internet.

I realize any expectation of widespread audio loudness standardization on the internet would be unreasonable. There’s just too much stuff out there. And those who create and distribute the media possess a wide scope of skills. However there is one sort of passionate and now ubiquitous subculture that may be ripe for some level of standardization. Of course I’m referring to the thousands upon thousands of independenlty produced Podcasts available to the masses.

In the past I’ve made similar public references to the following exercise. Just in case you missed it, please try this – at you own risk!

Put on your headphones and queue up this episode of The Audacity to Podcast. Set your playback volume at a comfortable level, sit back, and enjoy. After a few minutes, and without changing your playback volume setting – queue up this episode of the Entrepreneur on Fire podcast.

waves-1

Need I say more?

From what I gather both programs are quite popular and highly regarded. I have no intension of suggesting that either producer is doing anything wrong. The way in which they process their audio is their artistic right. On the other hand in my view there is one responsibility they both share. That would be the obligation to deliver well produced content to their subscribers, especially if the Podcast generates a community driven revenue stream. It’s the one thing they will always have in common. And so I ask … wouldn’t it make sense to distribute media following audio processing best practices resulting in some level of consistency within this passionate subculture?

I suspect that some Podcast producers purposely implement extreme Program Loudness levels in an attempt to establish “supremacy on the dial.” This issue also exists in radio broadcast and music production, although things have improved ever since Loudness War participants were called to task with the inception of mandatory compliance guidelines.

I’ve also noticed that many prolific Podcast Producers (including major networks) are publishing content with a total lack of Program Loudness consistency within their own catalogs form show to show. Even more troubling, Podcast aggregation networks rarely specify standardization guidelines for content creators.

It’s important to note that many people who consume audio delivered on the internet do so in less than ideal ambient spaces (automobiles, subways, airplanes etc.) using low-fi gear (ear buds, headphones, mobile devices, and compromised desktop near fields). Simply adopting the broadcast standards wouldn’t work. The existing Program Loudness targets are simply unsuitable, especially if the media is highly dynamic. The space needs revised specs. in order to optimize the listening experience.

Loudness consistency from a Podcast listener’s perspective is solely in the hands of the producers who create the content. In fact it is possible producers may even share common subscribers. Like I said – the space is ripe for standardization.

Currently loudness compliance recommendations are sparse within this massive community driven network. In my view it’s time to raise awareness. A target specification would universally improve the listening experience and ultimately legitimize the viability of the platform.

For the record, I advocate:

File Format: Stereo, 128kbps minimum.
Program Loudness: -16.0 LUFS with acceptance of a reasonable deviation.
Loudness Range: 8 LU, or less.
True Peak Ceiling: -1.0 dBTP in the distribution file. Of course this may be lower.

Quick note: when I refer to Podcasts, from a general perspective I am referring to audio programs and videos/screencasts/tutorials that primarily consist of spoken word soundtracks. Music based Podcasts or cinema styled videos with high impact driven soundtracks may not necessarily translate well when the Loudness Range (and Dynamic Range) is constricted.

For further technical insight, please refer to “Audio for Mobile TV, iPad, and iPod” – Thomas Lund, TC Electronic.

-paul.

Cutting Edge Podcasting System …

It’s been a while since I’ve been called upon to design an audio system suitable for Podcasting. In 2004 I built a site that focused on all aspects of Podcast Production. I will (reluctantly) disclose that I am the person who coined the term “Podcast Rig.”

Besides a prolific user forum and gear reviews, the site included systems that I designed at various levels of price and complexity. They are still viable some 10 years later. I eventually sold the rights to the property and content, and the site was unfortunately buried beneath The Podcast Academy, a site that published audio recorded at various conferences and events. These days I’m still actively involved in the space, handling audio post for a select group of clients.

I continue to get a good amount of use out of the gear that I bought to record my own podcast (2004-2006). For instance I still have my Electrovoice RE-20 mic on my boom, with a Shure SM7B and a Heil PR-40 stored in my closet. I’m still using a Mackie Mixer (Onyx 1220i), and my rack is full of analog processors including an Aphex Compellor, a dbx mono compressor, a dbx voice processor, and a Telos One Digital Phone Hybrid. Up top in the rack I have a Marantz Solid State Compact Flash Recorder. At the very bottom I’ve integrated an NAD Power Amplifier that drives my near field monitors.

And I continue to keep a very close eye on on what’s out there with regards to suitable gear for Podcasting Systems. In fact I have a clear idea of what I would buy TODAY if I decided to replace the components in my current system. And it’s not a cheap solution intended for novices. In fact this new system is quite expensive. Relatively speaking, for the approximate cost of a custom 6-Core MacPro Tube – this is my vision for a cutting edge professional Podcasting System that I am convinced would supply a ton of flexibility and output reference quality audio.

The Console

Notice I make reference to Console instead of Mixer? This is by design. For the brain of my system I’ve decided on the Air-1 USB Radio Console by Audioarts Engineering.

air_1-NEW

The Air-1 features two XLR Mic Inputs, six Balanced Stereo Input channels, USB I/O, two Program Buses, and a Cue Output. The active state of the input channels can be controlled by channel dependent On/Off push button switches. Routing to the Program Buses as well as the Cue Bus is also controlled by the use of push button switches that illuminate when active. The level of the Cue Bus is independently controlled by a dedicated pot. The console uses long-throw faders that are common on broadcast consoles, with independent faders for Monitor and Headphone outputs. By the way the Cue is a prefader Bus on the inputs that allows the operator to monitor off-air channels. It’s entirely separate from the main mix, or in this case – the Program Bus.

The USB I/O is bidirectional. It can be used to send and receive audio from a computer workstation for easy recording, playout, and automation system integration. There’s ample flexibility for Skype and easy setup for a telephone hybrid mix-minus. The device uses an external power supply that is included.

Note that many output options and routing configurations are customizable by way of Dipswitches located on the bottom of the chassis. Currently the AIR-1 retails for $1,789.00 at BSW.

The Processor

Since 2004 there have been a few audio processors that have been widely used by Podcast Producers. At first I recall the popularity of the affordable dbx 266XL (now discontinued) 2-channel Compressor Expander/Gate. Then there was the Aphex 230 Vocal Processor (also discontinued) that achieved early acceptance due to excellent marketing by Aphex and their recognition of Podcasting as a viable option for broadcasters to widen their reach. The device eventually attracted the interest of Podcast Producers who were willing to shell out upwards of $700 for this great sounding piece of gear.

These days (and much to my surprise) there is a fairly inexpensive Compressor/Limiter/Gate by Behringer that has steadily gained popularity in the space. From what I can tell this is due to a few prolific “Podcast Consultants” using the processor and recommending/selling it for whatever reason. Personally I was never a fan of the brand. But that’s just me.

For this new high end system I am selecting the Wheatstone/Vorsis M-1 Digital Mic Processor.

m-1

The processor uses sophisticated digital audio processing algorithms throughout it’s internal chain. On the back of the unit there is one AES digital output, one Mic input, and a single analog (XLR) output that can be set to pass Mic or Line Level signal. This is important in the design of this Podcasting System due to the way in which it would connect to the Air-1 Console. In essence the Mic would get connected to the processor input and the analog output switched to Mic Level would feed one of the dedicated Mic channels on the Console. There is also a Dipswitch matrix located on the back of the device that allows the operator to customize a few options and functions.

The M-1 supports variable Sample Rates, has switchable Phantom Power, Hi-Pass/Low-Pass filters, a De-Esser, Compressor, and Expander. There are independent Input and Output Gain pots and a Level Meter that can be switched to monitor Input or Output. There is also a De-Correlator function, also referred to as a Phase Rotator that will tweak waveform symmetry.

Also included is dual Parametric EQ with user defined frequencies, cut/boost control, and variable Q. In addition there are two independent Shelving filters that can be used to shape the overall frequency response of the signal. The EQ stage can be placed before or after the Compressor in the processing chain.

But that’s not all. The M-1 can be controlled and customized locally or remotely via Windows GUI software running on a PC. Note that although this feature is intriguing, it would be of no use to me based on my dependency to the Mac platform. In fact from what I can tell there may be some Windows operating system incompatibilities with the bundled software. This may very well cause difficulties running the Windows software on a Mac in an emulated environment. I’ll need to check into it. But like I said, with no native support for the Mac I would probably need to pass. Currently the M-1 Processor retails for $799.00 at BSW.

The Mic

At this point it would make very little sense to even consider purchasing yet another microphone based on my current lot (EV RE-20, Shure SM7B, and Heil PR-40). But I figured what the heck – why not explore and try something new? Note that I’ve never tested the following mic. So I’m shamelessly speculating that I would even like it!. What drew me to this mic was the reputation of the manufacturer and the stellar package deal that is currently available. The mic is the Telefunken M82 Broadcast.

mic

The M82 is an end-address, large diaphragm (35mm capsule) cardioid dynamic mic (Frequency Range 25Hz – 18kHz). What’s interesting is this mic is designed to be used as a kick-drum mic, yet it is well suited for broadcast voice applications. In fact if I recall the timeless EV-RE20 was also originally designed to be used as a kick-drum mic before it was widely embraced by radio and voice professionals.

Anyway the Telefunken supplies two separate EQ Switches:Kick EQ and High Boost. The Kick EQ engages a lower mid-range cut at around 350Hz. The High Boost shifts upper mid-range and high frequencies starting around 2kHz with a 6dB boost by 10kHz. Any combination of the two switches can be used to tailor the response of the mic.

Here is what really caught my attention – the mic is available in a Broadcast Package that includes the M786 Broadcast Boom with built in XLR cable, the M700 Shock Mount, and a protective case. Currently the M82 Broadcast Package retails for $499.00 at BSW.

The Hybrid

As far as I’m concerned any serious Podcast Producer who intends to incorporate remote guests needs to implement an easy alternative to the now ubiquitous Skype. A Digital Telephone Hybrid is the obvious choice, allowing program guests to call into the host system using a standard telephone line. With proper configuration of a mix-minus by the host, seamless communication can be achieved.

Sometime around 2010-2011, Telos Systems replaced the ubiquitous Telos One with the brand new Hx1 Hybrid. I’ve chosen this device for my system.

hybrid

The Hx1 receives an analog “POTS” (Plain Old Telephone Service) line signal and implements digital conversion resulting in excellent audio quality. This Hybrid features automatic gain control in both directions, a ducking system, feedback reduction, and a digital dynamic EQ. The device is also capable of Auto-Answer functions for unattended operation.

Using the Program 2 Bus on the Air-1 Console to feed the Hx1 input, setting up a broadcast mix-minus would be a snap. In my current system I’ve placed a single channel dbx dynamics compressor between the output of my Telos One and the input used on my Mackie Board. This works pretty well. I’d need to test this setup with the Hx1 to determine whether the compressor would even be necessary. Currently the Telos Hx1 Digital Hybrid retails for $695.00 at BSW.

The Recorder

I’ll be frank:In a studio environment I’m not a fan of using a small, handheld digital recorder. I’m aware of what’s being recommended by the experts, mainly models by Edirol and Roland. Of course these devices are perfectly capable and well suited for remote recording, ENG, and video production. I prefer a dedicated rack mounted component, just like the Marantz PMD-570 currently living in my rack.

The Marantz piece that I own has an interesting feature: Besides PCM and MP3 recording, the unit can record directly to MP2 (MPEG-1, Layer II) on the fly. This is the file format that I use to exchange large files with clients. Basically the clients will convert lossless files (WAV, AIFF) to MP2 prior to uploading to my FTP server. In doing so the file is reduced in size by approximately 70%. The key is when I take delivery and decode … most, if not all of the audible fidelity is retained. Needless to say MP2 is a viable intermediate file format and it is still used today in professional broadcast workflows.

Again it’s time for something new. For this Podcasting System I’m going with the Tascam SS-R200 Solid State Recorder.

recorder

The SS-R200 will accept Compact Flash and SD/SDHC Memory cards as well as USB Flash Drives. The device will also accept a USB keyboard that can be used for metadata editing. Supported file formats are WAV and MP3 @ 44.1/48kHz. I/O is flexible and includes XLR balanced input/output, RCA unbalanced, and coaxial S/PDIF digital. There are additional I/O support options for RS-232C and Parallel Control for external device interfacing. The display is clear, and the transport buttons are large and easily accessible.

One slight issue with the recorder – I don’t believe you can connect it directly to a computer via USB (My Marantz supports this). Of course the work around is to use USB Flash drives for recording. Compact Flash and SD/SDHC recording will require an additional device for computer interfacing. Currently the Tascam SS-R200 recorder retails for $549.00 at BSW.

The Cost

Time to tally up:

Audioarts Air-1 Console: $1,789.00
Wheatstone M-1 Processor: $799.00
Telefunken M82 Mic Kit: $499.00
Telos Hx1 Hybrid: $695.00
Tascam CF Recorder: $549.00

Total: $4,331.00 (not including applicable tax and shipping)

There you have it. Like I said this is far from a budget solution. And surely I’m not suggesting that you need to spend this kind of cash to record Podcasts. However for the serious producer with appropriate technical skills and a revenue stream, this is not unattainable. As far as me personally – at this time this system is not in my immediate plans. But you never know. I’ve always wanted to replace my mixer with a Broadcast Console, so contemplation will continue …

Notes

I’ve purposely refrained from recommending accessories including cables and headphones. And regarding headphones, after years of wearing them for hours upon hours, I’ve moved over to a moderately priced set of Shure SE215 Earphones.

Full sized headphones can be very uncomfortable when worn for extended periods of time, hence my decision. Believe me it was a major adjustment. These Shure’s are not considered a high-end option. However they do serve the purpose. Isolation is good and sound quality is perfectly suitable for dialogue editing. And I’m much more comfortable wearing them. I still use my Beyer Dynamics, AKG’s, and Sony’s for critical monitoring when necessary.

And I’ve also refrained from recommending software solutions like DAWS and plugins. This would be the source of yet another installment. However I will make one recommendation. If you are serious about high quality sound and often deal with problematic audio, you need to seriously consider RX3 Advanced by iZotope.

rx3

In my work this package is simply indispensable. I’m not going to get into the specifics. I will say that the Broadband DeNoiser, the Dialog Denoise Module, and the Dereverb features are simply spectacular. Indeed it’s an expensive package. I’m grateful that I have it, and it’s highly recommended.

And lastly, storage. Since all components are rack-mountable, the obvious solution would be a 4U enclosure by Middle Atlantic or Raxxess. I would also suggest a 1 Space Vent Panel installed between the Processor and the Hybrid. And if it’s convenient the Console can be placed on top of the enclosure due to it’s relatively small footprint.

One final note:I have no formal affiliation with BSW. I simply pointed to their listings due to price and availability.

-paul.

Avid Impact …

Since upgrading to Pro Tools 11 – I lost access to one of my favorite plugins – The Glue by Cytomic. The Glue is an analog modeled console-style Mix Bus Compressor that supports Side-Chaining and features a classic needle type gain reduction meter. This plugin gets high marks in the music production community. In my work I find it very useful on mix buses and to tame dynamics in individual clips. At this time there is no AAX Native version available, although I’ve read a release may be imminent.

After using The Glue for about a year – I grew very fond of the form factor and ease of use. And, the analog gain reduction meter is just too cool. Here’s a video that demonstrates how The Glue can be used as a Limiter to tame transients.

I have a bunch of Compressors that I use in Pro Tools including C1 by Waves and Pro-C by FabFilter. I also use the Compressors included in the Dynamics modules in iZotope’s Ozone and Alloy plugins.

I decided to look around for a suitable replacement for The Glue that would work well in my Pro Tools environment. I was surprised when I stumbled upon something offered by Avid … Impact Mix Bus Compressor.

impact_blog

Before shelling out $300 for this plugin, I decided to check eBay. Sure enough I found a reliable reseller who was accepting offers for this previously registered plugin by way of an iLok license transfer. I secured the license for $80. I’m hoping this is legit

Regardless, I’m looking forward to adding this new tool to my Pro Tools rig. We’ll see how well it stacks up against The Glue.

-paul.

Update:The license transfer worked out fine and from what I’ve heard the process is totally legit …

Information Bar Fill @2.35:1 …

I am releasing an alternative version of my Information Bar Fill Custom Lower Third Title for FCPX.

This version is designed to be used over clips with a 2.35:1 aspect ratio. Basically I’ve tweaked the default values for the initial positioning of the two lines of text as well as the graphical bar.

I’ve also reset the low value limit for the horizontal positioning of the text and bar that will prevent these elements from moving outside of the image frame.

bar-fill_cinemascope

Download

-paul.

Reframing Images in Photoshop for “Cinematic” look …

2.35:1 (480×204) Reframed Image

russia_cinematic

Here’s how I reframe still images in Photoshop targeting a more “Cinematic” 2.35:1 aspect ratio. Reframed images can be resized and used in blog posts, tweets, etc. You can also use this method to reframe stills that will be used in your 2.35:1 video editing projects.

Below is the original image that I lifted from the web (I hope I don’t get in trouble for using it!). It’s approximately displayed at 1.64:1, 480×292 resolution.

russia_square

I’m going to be using some pretty basic Photoshop techniques to reframe this image and save it. I’ll be using the Marquee Selection tool and the Move tool.

When using the Marquee Selection tool, I prefer to display the selected dimensions as Pixels. This preference is located in PS Preferences/Units & Rulers/Units/Rulers.

pixels

With the Marquee Selection tool active, drag over the original image and note the horizontal pixel count for your new target frame.

Let’s assume our selection is 940 pixels wide. Since we’re targeting 2.35:1 – our formula is 940 / 2.35, which gives us 400. In order to match the target aspect ratio, the new reframed image will need to be 940 pixels x 400 pixels.

Create a new Photoshop file with a transparent background, sized at 940×400. I’m going to refer to this as our new container.

trans

Access the original image, copy it (full frame) – and paste it into the new 940×400 transparent container.

needs-reframe

Activate the Move tool. With it’s layer selected – reposition (reframe) the original image within the new 2.35:1 container.

russia_cinematic

The results above were then resized to 480×204 (2.35:1 relative) to properly display in this blog post.

Pretty basic stuff, but it works …

-paul.

Waves WLM Plus Loudness Meter …

Waves has just released a stellar update to their critically acclaimed WLM Loudness Meter. The new WLM Plus version, available for free to those who are eligible – includes a few new and very useful features.

The plugin now acts as both a Loudness Meter and a Loudness Processor. New controls (Gain/Trim) are located in the Processing Panel and are designed to apply loudness normalization and correction. There is also a new switchable True Peak Limiter that adheres to the True Peak parameter defined in the selected running preset.

Here’s how it works:

Notice below I am running WLM Plus using my own custom preset (figg -16 LUFS). Besides the obvious Integrated Loudness target (-16 LUFS), I’ve defined -1.0 dBTP as my True Peak ceiling.

wlm-blog

What you need to do is insert the plugin at the end of your chain. Turn on the True Peak Limiter. Now play through the entire segment that you wish to measure and correct. During playback the textField value located on the WLM Plus Trim button will update in realtime, displaying the proper amount of gain compensation that is necessary to meet the Integrated Loudness target (it’s +2.1 dB in this example).

When measurement is complete, simply press the Trim button. This will set the Gain slider to the proper value for accurate compensation. Finish up by bouncing the segment through WLM Plus, much the same as any processing plugin. The processed audio will now match the Integrated Loudness Preset target and True Peaks will be limited accordingly.

I haven’t tested this in Pro Tools but my guess is this also works when using WLM Plus as an Audio Suite process on individual clips.

Of course you can make a manual adjustment to the Gain slider as well. In this case you would use the displayed Trim Value to properly set the necessary amount of gain compensation.

Great update to this well designed Loudness Meter.

-paul.

Adobe Loudness Radar Up and Running …

With the release of the Adobe “CC” versions of Audition and Premiere Pro, users now have access to a customized version of the tc electronic Loudness Radar Meter.

LR-Banner

In this video from NAB 2013, an attendee asks an Adobe Rep: “So I’ve heard about Loudness Radar … but I don’t really understand how it works.”

I thought it would be a good idea to discuss the basics of Loudness Radar, targeting those who may not be too familiar with it’s design and function. Before doing so, there are a few key elements of loudness meters and measurement that must be understood before using Loudness Radar proficiently.

Loudness Measurement Specifications:

Program “Integrated” Loudness (I): The measured average loudness of an entire segment of audio.

Loudness Range (LRA): The difference between average soft and average loud parts of a segment.

True Peak (dBTP): The maximum electrical amplitude with focus on intersample peaks.

Meter Time Scales:

• Momentary (M) – time window:400ms
• Short Term (S) – time window:3sec.
• Integrated (I) – start to stop

Program Loudness Scales

Program Loudness is displayed in LUFS (Loudness Units Relative to Full Scale), or LKFS (Loudness K-Weighted Relative To Full Scale). Both are exactly the same and reference an Absolute Scale. The corresponding Relative Scale is displayed in LU’s (Loudness Units). 0 LU will equal the LUFS/LKFS Loudness Target. For more information please refer to this post.

LU’s can also be used to describe the difference in Program Loudness between two segments. For example: “My program is +3 LU louder than yours.” Note that 1 LU = 1 dB.

Meter Ranges (Mode/Scale)

Two examples of this would be EBU +9 and EBU +18. They refer to EBU R128 Meter Specifications. The stated number for each scale can be viewed as the amount of displayed loudness units that exceed the meter’s Loudness Target.

From the EBU R128 Doc:

1. (Range) -18.0 LU to +9.0 LU (-41.0 LUFS to -14.0 LUFS), named “EBU +9 scale”

2. (Range) -36.0 LU to +18.0 LU (-59.0 LUFS to -5.0 LUFS), named “EBU +18 scale”

The EBU +9 Range is well suited for broadcast and spoken word. EBU +18 works well for music, film, and cinema.

Loudness Compliance: Standardized vs. Custom

As you probably know two ubiquitous Loudness Compliance Standards are EBU R128 and ATSC A/85. In short, the Target Loudness for R128 is -23.0 LUFS with peaks not exceeding -1.0 dBTP. For ATSC A/85 it’s -24.0 LKFS, -2.0 dBTP. Compliant loudness meters include presets for these standards.

Setting up a loudness meter with a custom Loudness Target and True Peak is often supported. For example I advocate -16.0 LUFS, -1.5 dBTP for audio distributed on the internet. This is +7 or 8 LU hotter than the R128 and/or ATSC A/85 guidelines (refer to this document). Loudness Radar supports full customization options to suit your needs.

Pause/Reset

Loudness meters have “On and Off” switches, as well as a Reset function. For Loudness Radar – the Pause button temporarily halts metering and measurement. Reset clears all measurements and sets the radar needle back to the 12 o’clock position. Adobe Loudness Radar is mapped to the play/pause transport control of the host application.

Gating

The Loudness Standard options available in the Loudness Radar Settings designate Measurement Gating. In general, the Gate pauses the loudness measurement when a signal drops below a predefined threshold, thus allowing only prominent foreground sounds to be measured. This results in an accurate representation of Program Loudness. For EBU R128 the relative threshold is -10 LU below ungated LUFS. Momentary and Short Term measurements are not gated.

• ITU BS.1770-2 (G10) implements a Relative Gate at -10 LU and a low level Gate at -70 LU.

• Leq(K) implements a -70 LU low level Gate to avoid metering bias during 100% silent passages. This setting is part of the ATSC A/85 Specification.

Loudness Radar In Use

In Audition CC you will find Loudness Radar located in Effects/Special/Loudness Radar Meter. It is also available in the Effects Rack and in the Audio Mixer as an Insert. Likewise it is available in Premiere Pro CC as an Insert in the Audio Track Mixer and in the Audio Effects Panel. In both host applications Loudness Radar can be used to measure individual clips or an entire mix/submix. Please note when measuring an audio mix – Loudness Radar must be placed at the very end of the processing chain. This includes routing your mix to a Bus in a multitrack project.

Most loudness meters use a horizontal graph to display Short Term Loudness over time. In the image below we are simulating 4 minutes of audio output. The red horizontal line is the Loudness Target. Since the simulated audio used in this example was not very dynamic, the playback loudness is fairly consistent relative to the Loudness Target. Program Loudness that exceeds the Loudness Target is displayed in yellow. Low level audio is represented in blue.

Each horizontal colored row represents 6 LU of audio output. This is the meter’s resolution.

histrogram

Loudness Radar (click image below for high-res view) uses a circular graphic to display Short Term Loudness. A rotating needle, similar to a playhead tracks the audio output at a user defined speed anywhere from 1 minute to 24 hours for one complete rotation.

LM-480

The circular LED meter on the perimeter of the Radar displays Momentary Loudness, with the user defined Loudness Target (or specification target) visible at the 12 o’clock position. The Momentary Range of the LED meter reflects what is selected in the Settings popup. The user can also customize the shift between green and blue colors by adjusting the Low Level Below setting.

The numerical displays for Program Loudness and Loudness Range will update in real time when metering is active. The meter’s Loudness Unit may be displayed as LUFS, LFKS, or LU. The Time display below the Loudness Unit display represents how long the meter is/was performing an active measurement (time since reset). Lastly the Peak Indicator LED will flash when audio peaks exceed the Peak Indicator setting.

If this is your first attempt to measure audio loudness using a loudness meter, focus on the main aspects of measurement:Program, Short Term, and Momentary Loudness. Also, pay close attention to the possible occurrence of True Peak overs.

In most cases the EBU R128 and ATSC A/85 presets will be suitable for the vast majority of producers. Setup is pretty straightforward:select the standardization preset that displays your preferred Loudness Unit (LUFS, LKFS, or LU’s) and fire away. My guess is you will find Loudness Radar offers clear and concise loudness measurements with very little fuss.

Notes:

You may have noticed the Loudness Target used in the above graphic is -16.0 LUFS. This is a custom target that I use in my studio for internet audio loudness measurements.

-paul.

Articles and Documentation used as Reference:

tc electronic LM2 Plugin Manual

ITU-R BS.1770-3 Algorithms to measure audio programme loudness and true peak audio level

EBU R128 Loudness Recommendation

EBU-Tech 3341 Loudness Metering

Loudness Meters: Absolute/Relative Scales …

Professional audio Loudness Meters measure Program (Integrated) Loudness using an Absolute scale displayed in LUFS (or LKFS). For example the EBU R128 Program Loudness target is -23.0 LUFS (Loudness Units Relative to Full Scale).

When the ITU defined new audio loudness measurement guidelines, the general consensus was that many audio engineers would prefer to mix to the familiar “0” level on a Loudness Meter for compliance targeting. A Relative scale option was implemented. It references Loudness Units (LU), where 0 LU equals the corresponding LUFS/LKFS compliance target.

So for EBU R128 … 0 LU == -23.0 LUFS.

In the snapshot below you can see my Nugen VisLM Loudness Meter set to display Absolute scale (left) and Relative scale (right).

scale-blog

Of course in most cases the scales and corresponding targets are customizable. For example I advocate -16.0 LUFS as the loudness target for audio distributed on the internet. By defining -16.0 LUFS as my Absolute scale compliance target in a meter’s setup options, 0 LU (Relative scale) would be equivalent to -16.0 LUFS.

Below is a basic side by side comparison of EBU R128 Absolute and Relative scales:

figg-scale

-paul.

Internet Audio: True Peak Compliance …

Wide variations in average (Program/Integrated) Loudness are common across all forms of audio distributed on the internet. This includes audio Podcasts, Videocasts, and Streaming Media. This is due to the total lack of any standardized guidelines in the space. Need proof? Head over to Twit.tv and listen to a few minutes of any one of their programs. Use headphones, and set your playback volume to a comfortable level.

Now head over to PodcastAnswerMan.com, and without making any change to your playback volume – listen to the latest program.

I rest my case.

In fact, there is a 10 LU difference in average loudness between the two. Twit.tv programs check in at approximately -22 LUFS. PodcastAnswerMan checks in at approximately -12 LUFS. I find this astonishing, but I am not surprised. I’m not signaling them out for any lack of quality issues or anything like that. In my view both networks do a great job, and my guess is they have sizable audiences. Both shows are well produced and it simply makes sense to compare them in this case study.

With all this in mind let me stress that at this particular time I am not going to focus on discussing Program Loudness variations or any potential suggested standard. I can assure you this is coming! I will say that I advocate -16.0 LUFS (Program/Integrated Loudness) for all media formats distributed on the internet. Stay tuned for more on this. For now I would like to discuss True Peak compliance that will be a vital part of any recommended distribution standard.

What surprises me more than Program Loudness inconsistency is just how many producers are pushing files with clipped, distorted audio. In many cases Intersample Peaks are present in audio files that have been normalized to 0 dBFS. (For more information on Intersample Peaks please refer to this brief explanation). Producers need to correct this problem before their audio is distributed.

The Tools

One of the most useful features included in Adobe Audition is the Match Volume Processor. This tool includes various options that allow the operator to “dial in” specific average loudness and peak amplitude targets. After processing, the operator can examine the results by using Audition’s Amplitude Statistics analysis to check for accuracy.

mvp-1

Notice in the snapshot above I set the processor to Match To: Total RMS, with a -18.50 dB RMS average target. I’ve also selected the Use Limiting option. I’m able to dial in custom Look-Ahead and Release Time parameters as I see fit. Is there something missing? Indeed there is. Any time you push average levels you run the risk of clipping the source. In Audition the Match Volume/Use Limiting option lacks the capability for the operator to set a specific Peak Amplitude Ceiling. I’ve determined that in certain situations Peak Amplitudes reach a -0.1 dB ceiling resulting in possible clipped samples and True Peak levels that exceeded 0dBFS. Keep in mind this is not always the case. The results depend on the Dynamic Range and available Headroom of any source.

So how do we handle it?

Notice above the Match Volume Processor offers two Peak Amplitude options: Peak Amplitude and True Peak Amplitude. The European Broadcasting Union’s EBU R128 spec. dictates -1.0 dBTP (True Peak) as the ultimate ceiling to meet compliance. Here in the states ATSC A/85 dictates -2.0 dBTP. Since most, if not all audio formats distributed on the internet are delivered in lossy formats, it is important to pay close attention to True Peak Amplitude for both source (lossless) and distribution (lossy) files.

fgm

I advocate -1.0 dBTP as the standard for internet based audio file delivery. True Peak Limiters are able to detect and alleviate the possibility of Intersample Peaks from occurring. It is recommended to pass audio through a True Peak compliant limiter after loudness normalization and prior to lossy encoding. Options include ISL by Nugen Audio, Elixir by Flux, and (the best kept secret out there) TB Barricade by ToneBoosters. If you are running Audition, Match To: True Peak Amplitude and you should be all set.

The plugin developers mentioned above as well as Waves, MeterPlugs, tc electronic, Grimm Audio, and iZotope supply Loudness Meters and toolsets that display all aspects of loudness specifications including True Peak alerts. Visit this page for a list of supported Loudness Meters.

If True Peak detection and compliance is not within your reach due to the lack of capable tools, a slightly more aggressive ceiling (-1.5 dBFS) is recommended for Peak Normalization. The additional .5 dB acts as a sort of safety net, insuring maximum peak amplitude remains at or below -1.0 dBFS. One thing to keep in mind … performing Peak Amplitude Normalization after Loudness Normalization may very well result in a reduction in average, program loudness. Once again changes to the processed audio will depend on the audio attributes prior to Peak Normalizing.

Below I’ve supplied data that supports what I noted above. The table displays three iterations of a test file: Input, Loudness Normalized Intermediate, and final Output. For this test I used the ITU-R BS.1770-2 “Match To” option in Audition’s Match Volume Processor. I pushed the average target to -16.0 LUFS. As noted, this is the target that I advocate for internet and/or mobile audio. This target is +7 LU hotter than R128 and +8 LU hotter than ATSC A/85.

After processing the Input file, the average target was met in the Intermediate file, but True Peak overs occurred. The Intermediate file was then passed through a compliant True Peak Limiter with it’s ceiling set to -1.0 dBTP. Compliance was met in the Output with a minimal reduction in Program Loudness.

data-480

Producers: there is absolutely no excuse if your audio contains distortion due to clipping! At the very least you should Peak Normalize to -1.5 dBFS prior to encoding your lossy MP3. Every audio application on the planet offers the option to Peak Normalize, including GarageBand and Audacity. Best case scenario is to adopt True Peak compliance and learn how to use the tools that are necessary to get it done. If you are an experienced producer or professional, and you come across content that does not comply – reach out and offer guidance.

-paul.

Waves MaxxVolume Revisited …

Back in October of 2012 I wrote about my purchase and initial impression of MaxxVolume by Waves. Let me first say I’m so glad I bought this tool. Secondly, my timing was impeccable. I was under the impression (when I purchased it) that the price of this plugin was significantly reduced on a permanent basis from $400 to $149 for the “Native” single version. Not the case. It is currently selling for $350 and discounted to $320. Like I said – my timing was impeccable.

waves-mv-478

Anyway, I’ve spent many hours working with this tool. Before I discuss one instance of my workflow, let me also mention that I recently purchased a license for their Renaissance Vox Dynamics Processor. This is yet another stellar tool by Waves. It features three slider “faders”: Gate, Compressor, and Gain. The Gate (Downward Expander) is very impressive. It works well when it may be necessary to tame an elevated noise floor in something like a voice over. The Compression algorithm is what really makes this plugin shine. As expected this setting controls the amount of Dynamic Range Compression applied to the source. At the same time it applies automatic makeup gain. What’s special is as the output gain potentially increases, the plugin will automatically prevent clipping by applying peak limiting. It’s all handled by a single slider setting. It turns out the High Level Compressor included in MaxxVolume is similar to the Compression stage in Renaissance Vox …

I’ve settled in on an order in which I set up MaxxVolume to act as a leveler when processing spoken word. I load the plugin with all controls in the OFF state. First I turn on the Low Level Compressor. This is essentially an Upward Expander that increases the level of softer passages. It doesn’t take much of an increase in gain to achieve acceptable results. At this point I rely solely on my ears for the desired effect.

Next I turn on the Gate (Downward Expander) and listen for any problems with the noise floor that may have resulted from the gain I picked up with the Low Level Compressor. Since I pass all my files through iZotope RX2 before introducing them to MaxxVolume – they are pretty quiet. In most cases the Gate’s Threshold is set somewhere between -60 and -70 dB. By the way the processor is set to the LOUD mode. This setting uses a more aggressive release resulting in a slightly “louder” output signal.

Now that I’ve dealt with low level signals and any potential noise floor issues – I set the Global Gain to -1.0dB. If I am dealing with a previously (loudness) normalized file with a set average target, I almost never deviate from this -1.0dB setting.

The last stage of the processor setup affects the aggression of the Leveler and handles Dynamic Range Compression. As previously stated – the High Level Compressor also applies automatic makeup gain as it’s Threshold is decreased. What’s interesting is it also applies gain compensation to the signal where aggressive leveling may result in heavy attenuation. Here once again if I am dealing with a segment with a set average loudness target, I need to maintain it. So I turn on the Leveler and set it’s Threshold to apply the desired amount of leveling. When the audio passes (goes above) the threshold, leveling is active. The main Energy Meter displays the audio level after the leveler and before any additional dynamics processing functions.

I finish up by turning on the High Level Compressor, setting it’s Threshold to apply the necessary amount of gain compensation to maintain my average (Program/Integrated) Loudness target. I use Nugen’s VisLM Loudness Meter to monitor loudness. Finally I fine tune the Low Level Compressor and Gate.

logic-480

This particular workflow is just one example of how I use MaxxVolume. The processor does an excellent job when setup to function as a speech volume leveler. In other instances I use it to attenuate playback of audio segments, programs, etc. that have been normalized to a much higher average loudness target than I see fit. With the proper settings MaxxVolume provides a highly customized method of gain attenuation that sounds so much better than just reducing output levels with channel faders in a DAW.

MaxxVolume is now an indispensable tool in my audio processing kit …

-paul.

LoudMax and Final Cut Pro X

One of the great features of Final Cut Pro X is the availability of Apple’s 64bit Logic audio processing plugins (aka Filters). In fact FCPX supports all 64bit Audio Units developed by third parties.

Let me first point out I’ve tested a fair amount of 64bit Audio Units in FCPX. Results have been mixed. Some work flawlessly. A few result in sluggish performance. Others totally crash the application. I can report that Nugen’s ISL True-Peak Limiter and Wave Arts Final Plug work very well in the FCPX environment.

ISL is a Broadcast Compliant True-Peak Limiter that uses standardized ITU-R B.S 1770 algorithms. Settings include Input Gain and True-Peak Limit. ISL fully supports Inter-Sample Peak detection.

Final Plug allows the operator to set a limiting Threshold as well as a Peak Ceiling. Decreasing the Threshold will result in an increase of average loudness without the audio output ever exceeding the Ceiling.

Recently Flux released a 64bit version of Elixir, their ITU/EBU compliant True-Peak Peak Limiter. Currently (at least on my MacPro) the plugin is not usable. Applying Elixir to a clip located in the FCPX storyline causes an immediate crash. I’ve reported this to the developer and have yet to hear back from them.

The plugins noted above range in price from $149 to $249.

One recommendation that often appears on discussion forums and blogs is the use of the Logic AU Peak Limiter to boost audio loudness while maintaining brick-wall limiting. This process is especially important when a distribution outlet or broadcast facility defines a specific submission target. A few audio pro’s have taken this a step further and recommended the use of the Logic Compressor instead of the Peak Limiter. In my view both are good. However proper setup can be daunting, especially for the novice user.

These days picture editors need to know how to color correct, create effects, and handle various aspects of audio processing. If you are looking for a straight forward audio tool that will brick-wall limit and (if necessary) maximize loudness, I think I found a viable solution.

lM.jpg LoudMax is an easy to use Peak Limiter and Loudness Maximizer. Operators can use this plugin to drive audio levels and to set a brick-wall Output Ceiling.

The LoudMax Output Slider sets the output Ceiling. So if you are operating in the “just to be safe mode”, or if you need to limit output based on a target spec., set this accordingly. If you need to increase the average loudness of a clip – decrease the Threshold setting until you reach the desired level. The Output Ceiling will remain intact.

LoudMax also includes a useful Gain Reduction Meter. If viewing this meter is not important to you – there’s no need to run the plugin GUI. The Threshold and Output parameters are available as sliders, much the same as any other FCPX Filter or Template. You can also set parameter Keyframes and save slider settings as Presets.

lM-H

Using the Logic Peak Limiter and/or Compressor is definitely a viable option. Keep in mind that achieving acceptable results takes practice. Proper usage does require a bit more ingenuity due to the complexity of the settings. I’ll be addressing the concepts of audio dynamics Compression in the future. For now I urge you to take a look at LoudMax. It’s 32/64bit and available in both VST and AU formats. The AU Version works fine in FCPX. I found the processed audio results to be perfectly acceptable.

At the time of this writing LoudMax is available as Freeware.

-paul.

Information Bar Fill Lower Thirds …

If you look in the FCPX Titles Effects Browser under the Lower Thirds Category you will notice an Information Bar Lower Thirds. The is a bundled FCPX Title. The title itself is actually quite stylish. It’s subtle, with a semitransparent black bar and customizable text positioned on two lines.

A few days ago I was sifting through a forum and noticed a post by a member who uses this title regularly. He was asking for help regarding the opacity of the “bar.” Basically it’s opacity was not customizable. It was preset to somewhere around 50%. The forum member politely asked if someone could possibly load up the title in Motion, tweak in an Opacity slider for the bar, and make it available. I knew this would be easy, especially if the default Title supported the “Open a copy in Motion” option. It did and the rest is history.

If you review the settings snapshot below you will notice I added additional options that make my version much more useful, at least for me. I added support for Global Y Positioning (more on this below), Fade In/Out Frames, Bar Opacity, Bar Left Indent, and Bar Roundness.

ib-matrix

By default the Title places the text within the 1.78:1 Title Safe Area located at the bottom left of the zone. The Global Y Position setting allows the operator to cumulatively move all Title elements up on the Y axis to 2.35:1 Title Safe positioning.

The Original version of the Title has two check boxes that control whether all elements fade in and/or out. I added Fade in and Fade Out sliders that support frame by frame customization. Setting the sliders to zero results in no fading.

Bar Opacity is now supported. I believe I set this up to default to 50% Opacity. Regardless – it’s now fully customizable.

Bar Left Indent is an interesting setting. Notice there is also a Bar Roundness setting that will change the shape of the bar. Since by default the bar is anchored to the left of the image frame, applying roundness to it results in a partially obstructed left edge. The Bar Left Indent setting moves the bar’s left edge in a few pixels to the right to compensate. In fact It can be used without any roundness applied as well for creative purposes.

There have been some reports of font change instability. In fact this behavior is also present in the original version of the Title. I found this to be not that big of a deal.

The Installer will place the Title in the FCPX Titles Browser under the Custom Lower Thirds Category/Information Bar Theme.

-paul.

Download

spotPoint Lighting Duo …

spotPoint Lighting Duo is now available for download. This version features simultaneous use and control of Spot and Point Lighting. I decided to build this out as an Effect. So there is no control for text as previously suggested.

Please read the following Notes prior to installing:

I decided to use a standard installer package as a delivery mechanism as opposed to the custom version that I wrote. I could have built a new custom installer for the Duo version and distributed it independently. Or I could have set things up to give the user the option to install one version or the other (Original / Duo) – or both. This would have required much more code. The package installer that I am using already supports this. It is easier to build and maintain, especially when multiple versions of a plugin are slated for distribution.

If you look in the Customize section of the installer you will see the original version of spotPoint Lighting as well as the new Duo version. spotPoint.1 is the same exact version as the original release. The only thing that is different is the FCPX Browser display thumbnail. If you have the previous version installed and elect to reinstall it – the existing version will be overwritten. You should not notice any difference except for the visual change of the browser thumbnail.

By the way these installer packages are easy to create. If you are developing and distributing Motion Templates and need help with creating an installer package, ping me. I’d be happy to walk you through it. I’m looking into building some sort of auto-notification system (like Sparkle) that would alert the user when new plugin versions or updates are available. The community needs something like this that is non-obtrusive to the user.

-paul.

Download

sp-duo

spotPoint Lighting – Simultaneously …

I’m working on the next version of spotPoint Lighting. The next version will include simultaneous use and control of Spot and Point Lights. The example below is actually a Title as opposed to the Effect that was initially released. I’m trying to decide which format would be more useful. Having two independent text layers right within the package is definitely a plus. OTOH Effects are much cleaner implementations, and least for me – all due to their ability to be applied to individual clips. Titles are fine for timeline compositing. They do add a bit of clutter to the mix …

Below I used the Spot Light to warm up the sky independent of the Point Light.

-paul.

spot-matrix

spotPoint Lighting for FCP X …

I’m distributing a new effect that offers some interesting control for simulated Spot and Point lighting of your video shots:

spotPoint Lighting

splight

As noted there are two Light Source options:Spot and Point. You can set the color of the light to suit your needs. Global controls include Intensity, Falloff, and Falloff Start. There are two dedicated controls for the Spot source:Spread Control and Edge Softener. The positioning of the light is controlled by a Drag Target. Incidentally both light sources are flat and frontal.

I really like the Point source lighting. You can create some very interesting looks and cinematic mood lighting scenarios., especially when experimenting with different color light sources.

Check out the produceNewMedia Vimeo Page for a demo. There is also a demo for Cinemascope Toolkit on that page as well.

In case you are wondering why I didn’t embed the video – for some reason I’m having problems with the Vimeo player when it is resized to fit into the supported area of my site theme (within a blog post). I am looking into it …

The custom installer will send the effect to a new Lightsource Category located in your FCPX Effects Browser.

-paul.

spotPoint Lighting

Download

Film Zone

Cinemascope Toolkit ver.1.2 has been released. The Crop Guides popup now displays one of three options:Letterbox, Film Zone, Letterbox and Film Zone. The Film Zone is essentially a set of colored cropping guides less the letterbox matte(s). Viewing the underlying clip with the Film Zone displayed on it’s own makes it easy to view what is being cropped. Also, the Film Zone display works well when the underlying clip is very dark at the top and/or bottom of the frame. You can set the Film Zone color to orange (default), black, or white.

Also new in this release is the capability to reposition the clip manually by clicking and dragging the center point object (Drag Target). When doing so the clip positioning sliders in the EFX UI will update accordingly.

Here is a look at the new controls:

In the image matrix below you can see the top clip was repositioned (and scaled). The visible Film Zone clearly displays the 2.35:1 frame. In the middle image the 2.35:1 Safe Zones are displayed along with the Film Zone. Note the clips reduced opacity. The bottom image is the cropped output.

Please note you must set the FCP X Player Background to Black when using Cinemascope Toolkit. Do this in the application Preferences/Playback. When you switch on the Safe Zones display the clip opacity is reduced. This provides a clear view of the zones. If the player background is set to Checkerboard, there’s nothing behind the clip – it’s transparent. The clip’s opacity reduction will be prevelant and this feature will be useless.

Also – I designed the matting system to be independent of the clip’s image layer. Any agressive grading or exposure adjustments will have no effect on the visual state of the letterbox matte(s).

-paul.

Download Cinemascope Toolkit

Safe Zones

Cinemascope Toolkit ver.1.1 was released yesterday. I added the ability to display 2.35:1 Safe Zones (Yellow or Blue) to clip(s) where the filter is applied. When the Safe Zones option is switched on the underlying clips’ opacity is reduced to about 30%.

Below I use the Yellow Safe Zones for better visibility.

The Rotation parameter is also new. Instead of publishing the default Motion circular knob object to control this effect I used a slider. Moving it in either direction rotates the video image CW/CCW up to +/- 20°. Keep in mind you may need to adjust the scale of the image to compensate for the rotation of the frame. It all depends on how you decide to frame your image within the letterbox matte(s).

I needed to export a still of the shot below @2.35:1. Notice in the top example the image framing is off. Pulling the Rotation slider slightly to the left fixed the problem. The exported (cropped) image looks much better.

One slight issue with this tool is that it is an “Effect.” This means it is applied on a clip by clip basis. Not a problem. However if for example you switch on the Safe Zones and reduce the clip’s Exposure/Highlights – the visibility of the Safe Zones are equally affected. If the toolkit was built as a Title or Generator, this would not be the case. OTOH Titles and Generators add additional clutter in your timeline. Also, any image manipulation to the underlying video (scale, position, etc.) from within the Title or Generator would be applied globally to everything below it. Obviously a problem. The ability to apply this kit as an Effect makes it much more useful …

-paul.

Download Cinemascope Toolkit

Cinemascope Toolkit …

I’ve released my Cinemascope Toolkit. The package includes a basic 2.35:1 matte (“Cinemascope Crop”) created in Motion and wrapped in a FCP X Effect. The Effect supports video Scale control and X/Y positioning. I’ve also included four Compressor Presets that output cropped MPEG-4/H.264 videos. Frame things up in FCP X and output using one of the presets for 2.35:1 aspect ratios.

The Installer is hard coded in Objective-C. All asset routing will be handled automatically when you run the installer. The Effect will be installed in a Matte Category under a Widescreen Theme in the FCP X Effects Browser. The Compressor Presets will be located in the Settings window under the Custom/CinemaScope Presets – Settings Group.

You can edit whatever is defined by the installer. For example I did not edit the naming convention that I use for my Compressor Presets. They all begin with the first four letters of my name. And of course the preset parameters can be edited to suit your needs.

You can customize the FCP Category and Theme as well. After installing the toolkit – pull the Cinemascope Crop folder out of the ~/Movies/Motion Templates/Effects/Mattes folder. Use my toMotion application to customize.

Download Cinemascope Toolkit

-paul.

Waves and MaxxVolume

The latest addition to my audio processing toolset is MaxxVolume by Waves. This dynamics processor has been on my radar for the past few years. I was always under the impression that Waves plugins required an iLok account/key. It was for this reason I never bothered to pull down the demo and test it.

A few days ago I noticed that a few online plugin resellers were advertising a price drop for MaxxVolume. I believe the original price was $300. Sweetwater and DontCrack are currently selling it for $149. I decided to purchase a license. By the way prior to doing so – I realized Waves has moved away from the iLok requirement. They now provide a standalone “Waves License Center” (WLC) application that can be used to manage both purchased and demo licenses. Licenses can be transferred to a host machine and/or a standard (FAT32 formatted) USB Flash Drive. You can then move and manage licenses via the Flash Drive or within their proprietary License Cloud.

After making a purchase you simply register the new product on the Waves site, run WLC, login to your Waves account – and move your license(s) from the cloud to your target destination. I must say the process was easy and seamless.

So what is MaxxVolume? The plugin is a four module dynamics processor: Low Level Compressor, Gate, Leveler, and High Level Compressor. All four processing stages run in parallel.

The Low Level Compressor is essentially an expander. So any signal that falls below the set threshold gets compressed upward. It’s controlled by a Threshold fader and Gain fader. The Gate feature is controlled by a single Threshold fader that applies gentile downward expansion affecting any signal that drops below the threshold setting. The Leveler is essentially an AGC (Automatic Gain Control) controlled by a single Threshold fader. Lastly the High Level Compressor is controlled by a Threshold fader and a Gain fader. This compressor functions just like any standard compressor – when the input signal exceeds the threshold it is attenuated. The Gain setting compensates for the attenuated signal.

Waves notes “It’s a Broadcast tool, bringing any program to a fixed destination level; ideal for radio and TV, podcasting, internet streaming, and more.” It took me some time to get a feel for how the four processing stages interact. So far I like what I’m hearing. The AGC is pretty impressive. I’m using Adobe Audition CS6 as my host. The processor works fine in the Adobe environment.

I will say this tool is not your sort of cut and dry loudness maximizer. It may not be suitable for less advanced or novice users. In my view a clear understanding of upward/downward expansion, AGC, and compression is a necessity.

-paul.

Intersample Peaks, Normalization, and Limiting …

When preparing to encode MP3 files we need to be aware of the possibility of Intersample Peaks (ISP) that may be introduced in the output, especially when targeting low bit rates. This results from the filtering present in lossy encoding. We alleviate this risk by leaving at least 1 dB of headroom below 0dBFS.

Producers should peak normalize source files slated for MP3 encoding to nothing higher than -1.0 dBFS. In fact I may suggest lowering your ceiling further to -1.5 dBFS sometime in the future. Let me stress that I’m referring to Peak Normalization and not Loudness Normalization. Peak Normalizing to a specific level will limit audio peaks when and if the signal reaches a user defined ceiling. It is possible to set a digital ceiling when performing Loudness Normalization as well. This is a topic for a future blog post.

Notice the ISP in this image lifted from an MP3 wave form. The original source file was peak normalized to -0.1 dBFS and exhibited no signs of clipping.

You can also avoid ISP’s by using a compliant ITU Limiter and setting the ceiling accordingly. During source file encoding this type of limiter will detect when ISP’s may occur in the encoded MP3.

For podcast and internet audio, a limiter set to a standardized ceiling of -1.0/-1.5 dBFS works well and is recommended.

-paul.

toMotion

One of the most useful features in the Final Cut Pro X/Motion 5 workflow environment is the ability to create, edit, publish, and share media content created in Motion 5. Creations like Effects, Titles, Generators, etc. can easily make their way into FCPX for widespread use. What is astonishing is these robust media tools can be created without writing a single line of code. Efficient distribution of these tools sparked my interest and lured me back into Xcode.

Before I preview my new application, let me explain the current (and kludgy) method of incorporating distributed Motion content into the necessary location(s) on the user’s system.

When you install Motion 5 a folder structure is created in the user’s ~/Movies folder. The top level folder (below “Movies”) is called Motion Templates. Below Motion Templates, 5 sub folders are created: Compositions, Effects, Generators, Titles, and Transitions. It’s important to note that each one of these folders pick up a .localized file extension. This was a very important issue that I needed to be aware of when developing the new application. More on this later …

Anyway, if a user is running both Motion 5 and FCPX, it is very easy to move Motion content to and from FCPX. This content is ultimately located and accessible in the FCPX Effects Browser. For example an Effects package can be “Published” from within Motion to FCPX and sent to a user appended “Category” located in the Effects Browser. This creates a very well organized list that makes it very easy to manage and access Motion tools while working on FCPX projects.

Here is where things get a bit confusing: As previously noted, Motion content authors can also share their creations. With this in mind I realized the user on the receiving end was forced to dig into the existing Motion Templates folder structure and manually place their acquired tools in the proper location. The minute I saw content authors including a snapshot similar to what I have inserted below, and using it to display where to place distributed content … I knew there had to be a better way.

Enter toMotion.

I won’t get into too much detail here. In fact I built a webpage, also accessible from within the application that explains the concept in full. It’s available HERE. Basically toMotion is a sophisticated folder routing tool that interacts directly with the Motion Templates sub folders and their underlying contents. You simply drag in acquired Motion content folders, set a destination with or without appending a custom Category, and fire away. The source folder is automatically moved to your targeted location. Keep in mind this is *not* a copy operation. The source input folder is in fact moved to the targeted location.

It also came to my attention that user’s who have not yet purchased and/or installed Motion 5 may still utilize distributed Motion content. The caveat here is they will not have the required folder structure in their ~/Movies folder. Without this folder structure it will be impossible for the content to be incorporated into the FCPX Effects Browser. To alleviate this I built in support for the creation of this necessary folder structure. The user can access this option from within the Application Preferences. Upon completion of this action the Motion Templates folder and it’s 5 subfolders will be in place and ready for content.

Finally I decided to add a Backup Solution. The user can select an existing folder located on their system, or create a new folder, and designate it as the backup repository. The backup action copies the the Motion Templates folder and it’s contents, appends a date, and sends it to the designated location.

I think the application turned out pretty well. I learned allot, which of course is my ultimate goal when writing these Cocoa Applications. By the way – I previously mentioned this .localized folder extension issue. I must admit this was an oversight on my part. I knew my code was working regarding folder creation and movement of folders to specific locations. I just could not send folders to the Motion Templates folder or any of it’s subfolders. I finally initiated a Get Info (⌘ + i) action on one of the folders and realized they all shared this .localized extension. I edited my code and I was good to go ..

-paul.

colorFloat

Last eve I was sifting through the Apple App Store looking for a simple utility to quickly convert RGB color values to corresponding float values (RGB integer / 255 = float). I decided to build my own Cocoa application with a few added enhancements.

High-res Image: colorFloat

Run the standard OSX Color Picker and press the second toolBar option (Color Sliders). Select the RGB Sliders option in the popup menu. Notice each RGB value changes as you move through the color spectrum. We can divide each one of the displayed values by 255 to return float values that can be used in source code authoring. In colorFloat the user adds an input RGB value (x3), converts, and appends each conversion result to the desired color channel. The final action displays the corresponding color for confirmation.

I also built in support for what I refer to as Dynamic Floats. Notice the Dynamic Floats HUD located in the high-res image. The Float value strings change dynamically as you move around the color wheel or change the values of the RGB sliders. This feature allows the user to easily sift through the color spectrum to view corresponding floats in real time.

Lastly, I added a simple Palette that consists of five Color Wells. The user can store colors for future access.

The app. turned out pretty well. I found it interesting to take a break from QTKit and explore a few unfamiliar Cocoa Classes.

Notes:

When I find the time I’ll be writing about a bunch of new stuff, mainly Adobe Audition for the Mac, Final Cut Pro X, and a new media playback application that I am finishing up with interesting support for images captured with one of my favorite iPhone apps. – Panascout. Lastly, FiRe 2 … an awesome iPhone audio recorder that supports waveform editing and audio processing.

-paul.